Solution Pattern: Name Template
See the Solution in Action
1. Demonstration
Demo is split into two parts:
-
Bootstrapping ODF Multicloud GitOps Part 1 : This video demonstrates Hub Cluster setup, ArgoCD deployment and import of the existing openshift clusters. Once clusters are imported, these managed clusters will be managed by RedHat ACM.
-
Bootstrapping ODF Mutlicloud GitOps Part 2 - AWS, GCP and Azure : This video demonstrates ODF installation on Hub as well as Managed clusters and RedHat Quay installation on the Hub Cluster.
1.1. Watch a demonstration
Bootstrapping ODF Multicloud GitOps Part 1
Bootstrapping ODF Mutlicloud GitOps Part 2 - AWS, GCP and Azure
2. Run the demonstration
2.1. Before getting started
To run this demo, we will need the following:
-
An Openshift cluster to be used as Hub Cluster(We are using Openshift Cluster deployed on AWS).
-
A second OpenShift cluster to be imported and managed by Hub Cluster(Cluster can be in GCP or Azure).
-
Helm
2.2. Installing the demo
We will need the following tools to deploy the demo:
-
make
-
sh
-
oc
-
git
-
ansible
-
kubernetes.core collection for ansible
To check if you have the cli tools, you can open your terminal and use following commands:
oc version
make --version
git version
ansible --version
ansible-galaxy --version
ansible-galaxy collection list #the list should include kubernetes.core
If you can’t see kubernetes.core collection listed, you can install it with ansible-galaxy:
$ ansible-galaxy collection install kubernetes.coreDetailed instructions to run the demo:
Below instructions are split into two main parts: 1. Setup Hub Cluster in Openshift cluster running in AWS. 2. Import Openshift cluster running in Azure to be managed by RedHat ACM in Hub Cluster.
-
Fork https://github.com/gmidha/multicloud-gitops/tree/odf on GitHub. Code resides in odf branch
-
Clone the forked copy of the above repo
git clone git@github.com:{username}/multicloud-gitops.git -
Change into directory multicloud-gitops and ensure that you are in odf branch
cd multicloud-gitops git checkout odf -
Login into Openshift cluster using oc login or exporting the KUBECONFIG.
oc login -
Apply changes to the cluster using below command
make install -
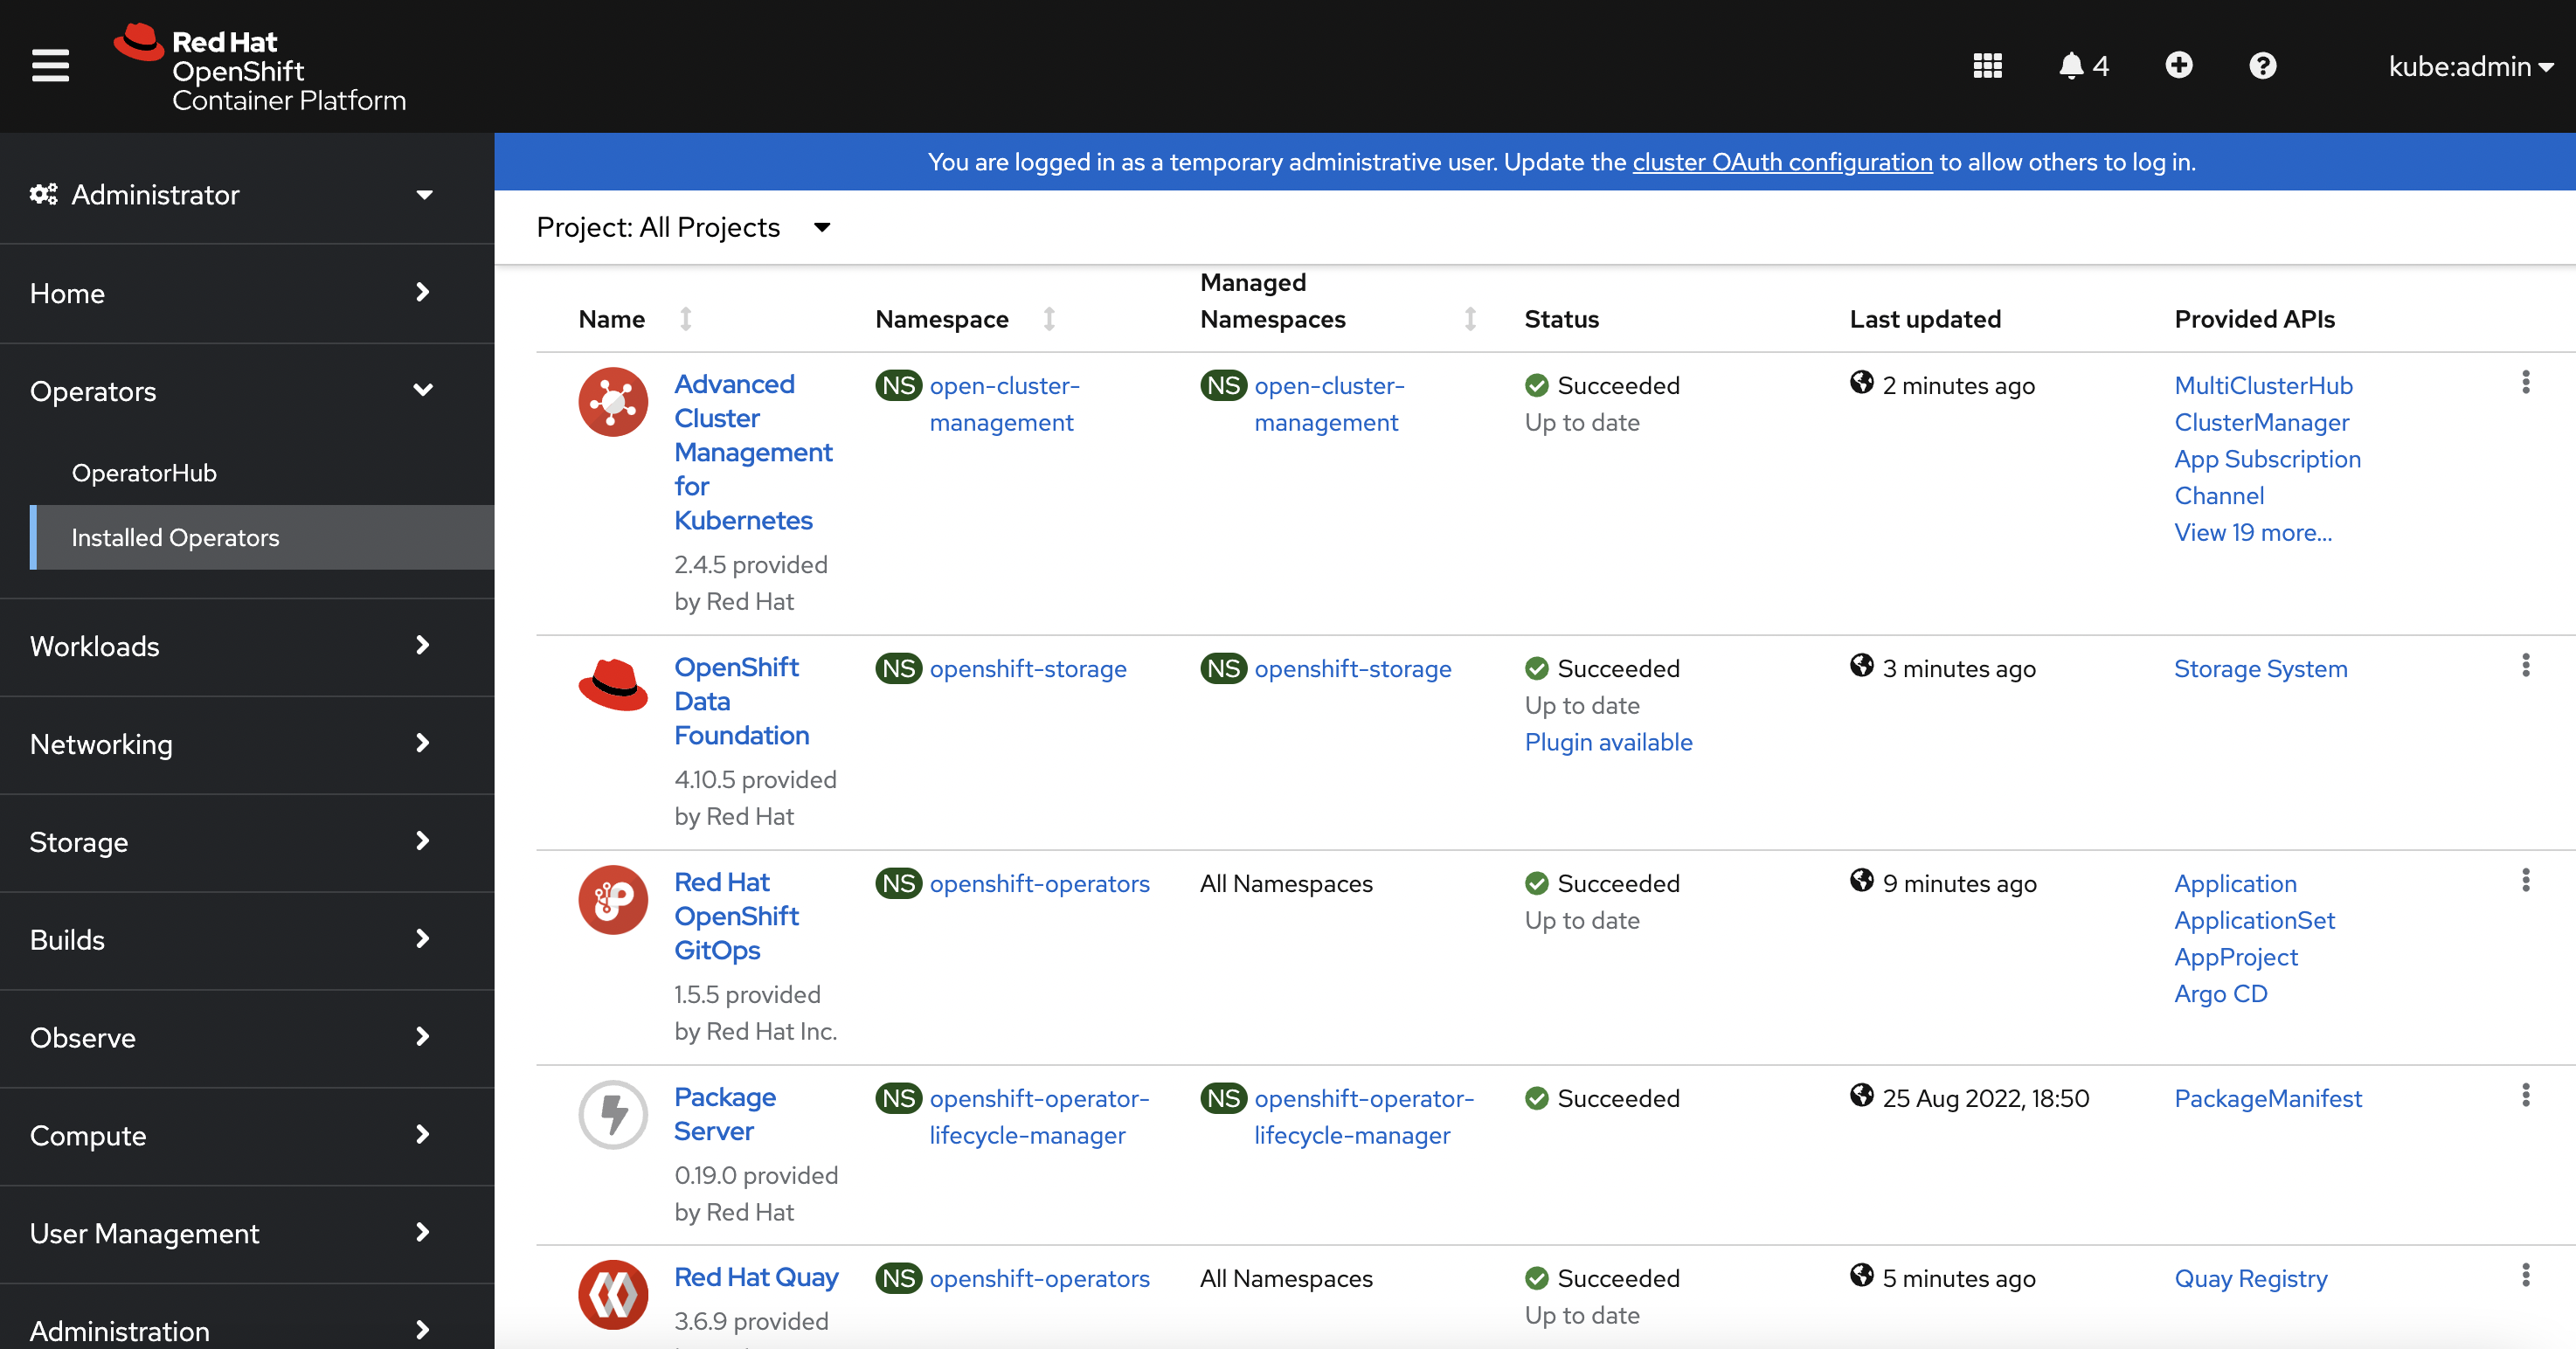
After 5 minutes on completion of above command, login into Openshift UI using a web browser and check the installed operators. Following Operators will be installed:
-
RedHat ACM
-
RedHat ODF
-
RedHat Openshift GitOps
-
RedHat Quay
-
-
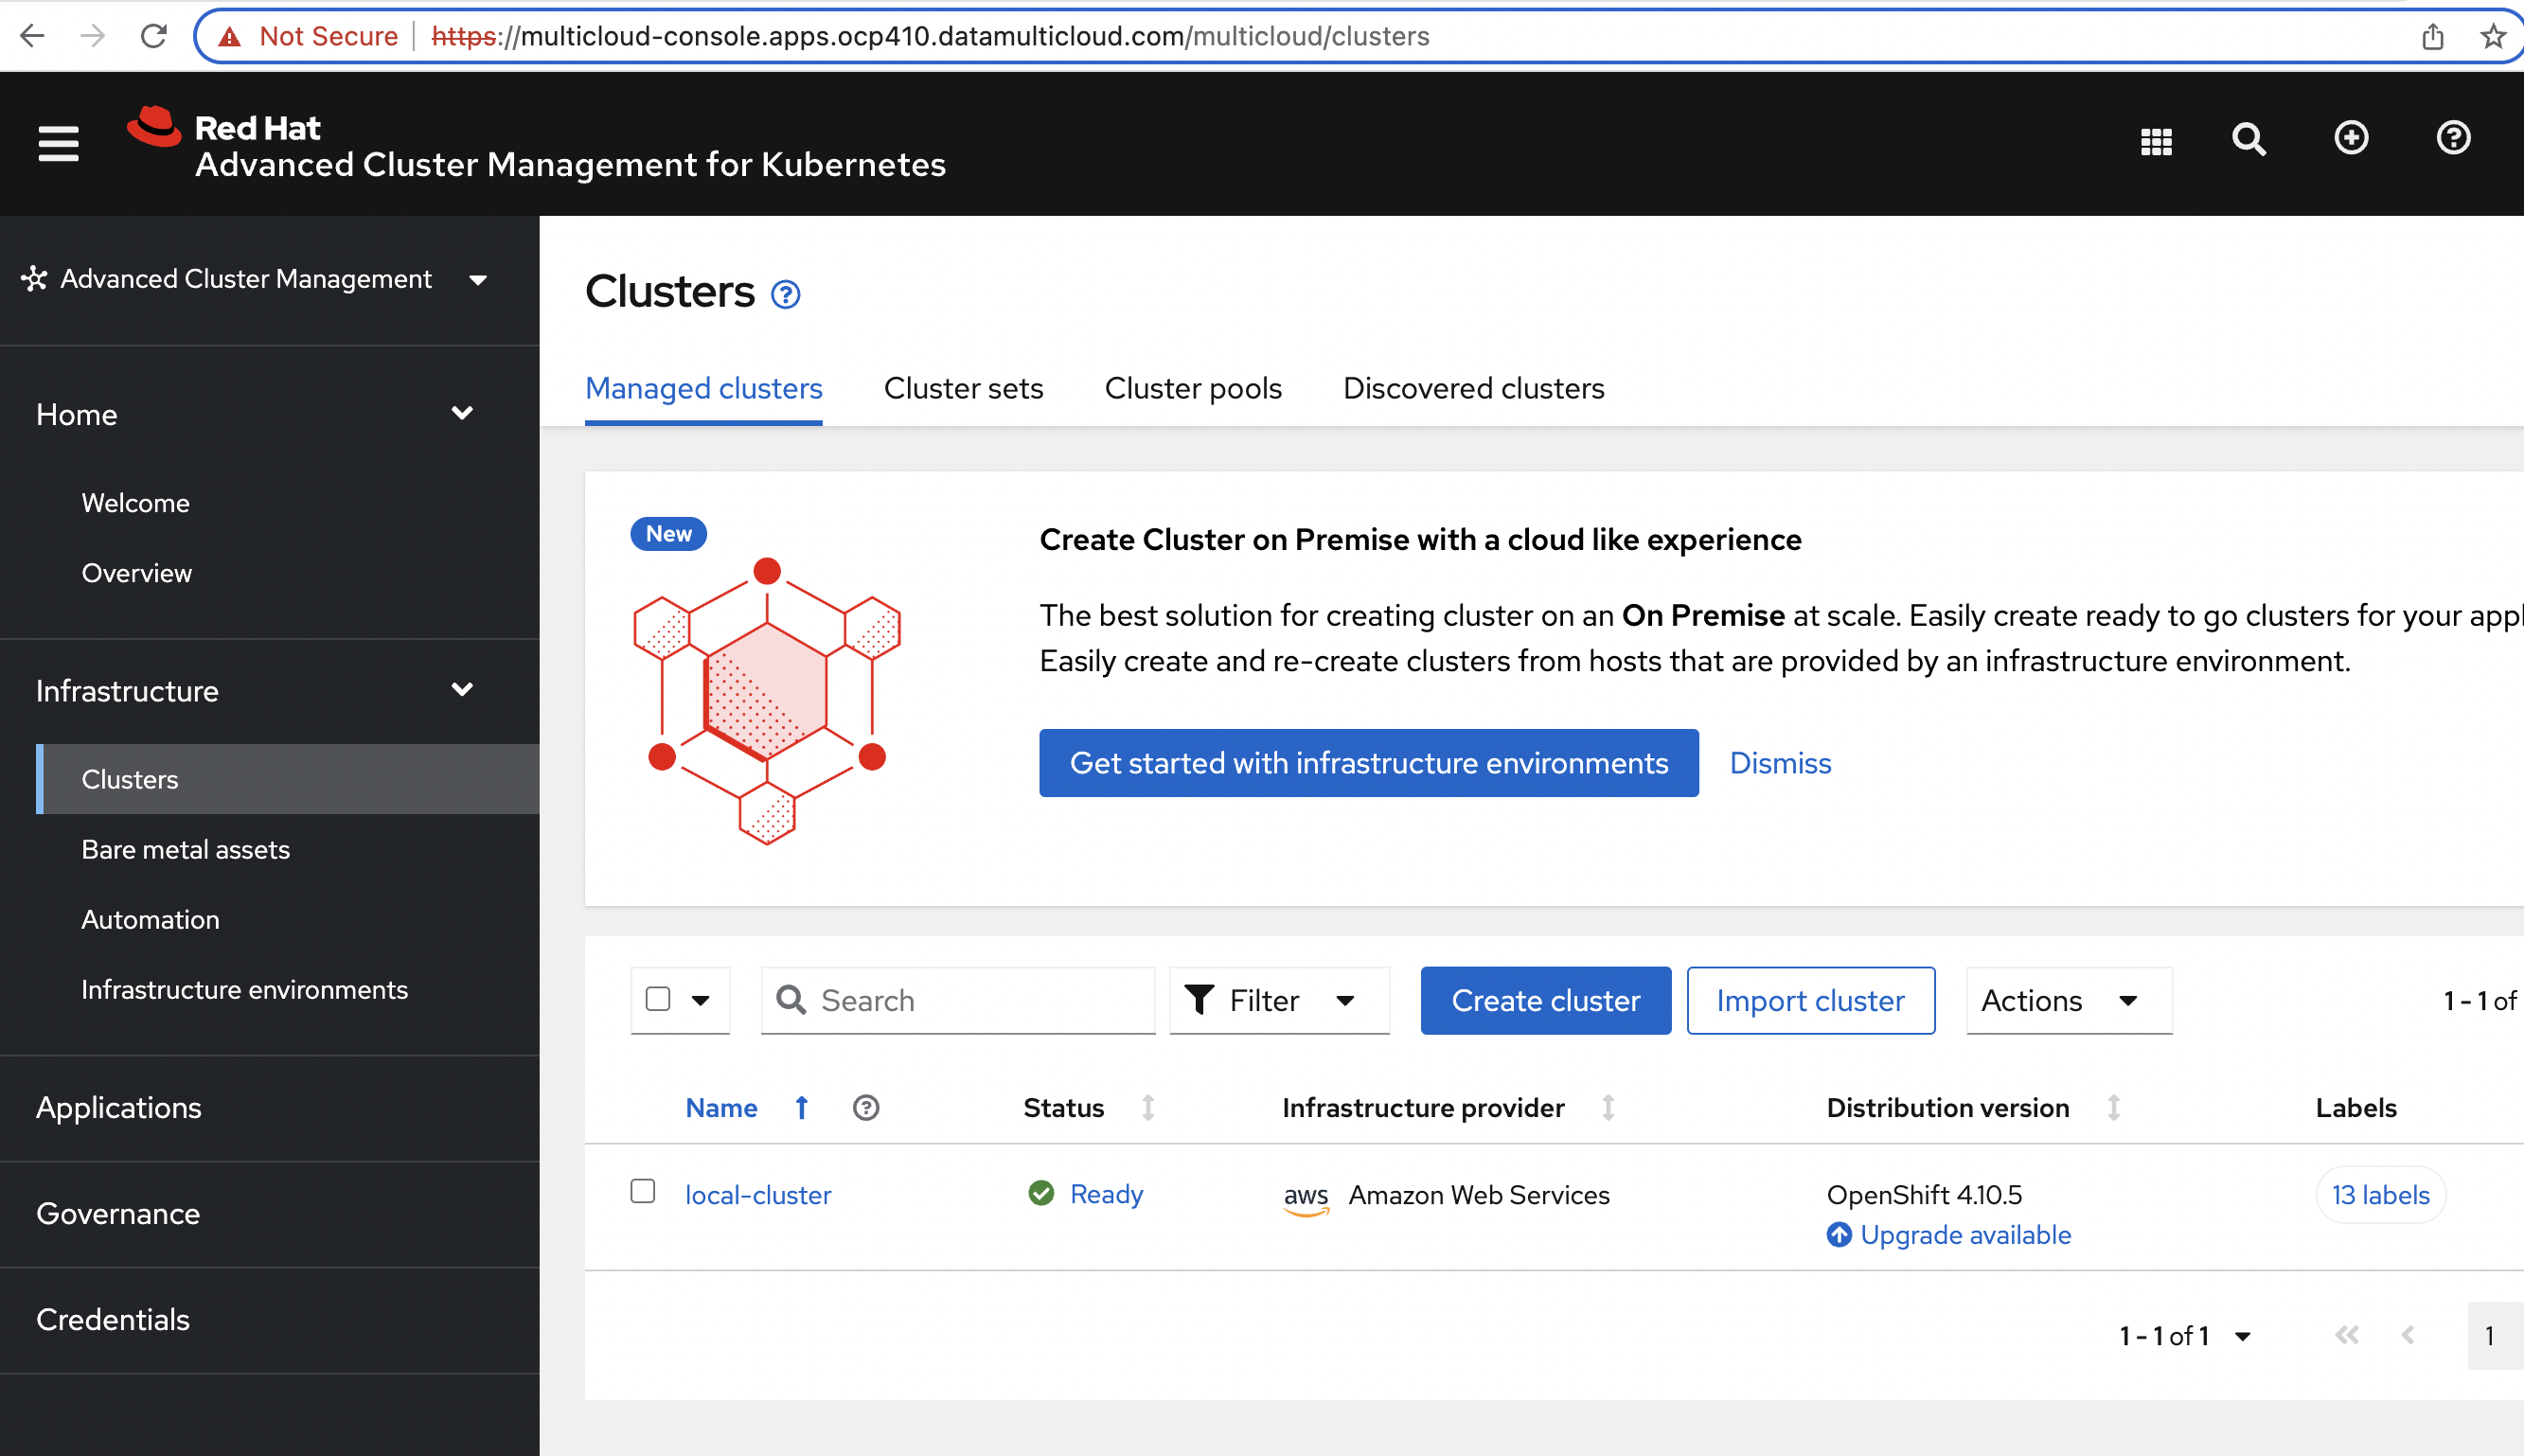
Using above steps our Hub Cluster setup has been done, we will be importing an Openshift cluster running in Azure cloud.
-
Using the below command get the HOST for RedHat ACM and open it in a web browser.
oc get route -n open-cluster-management
-
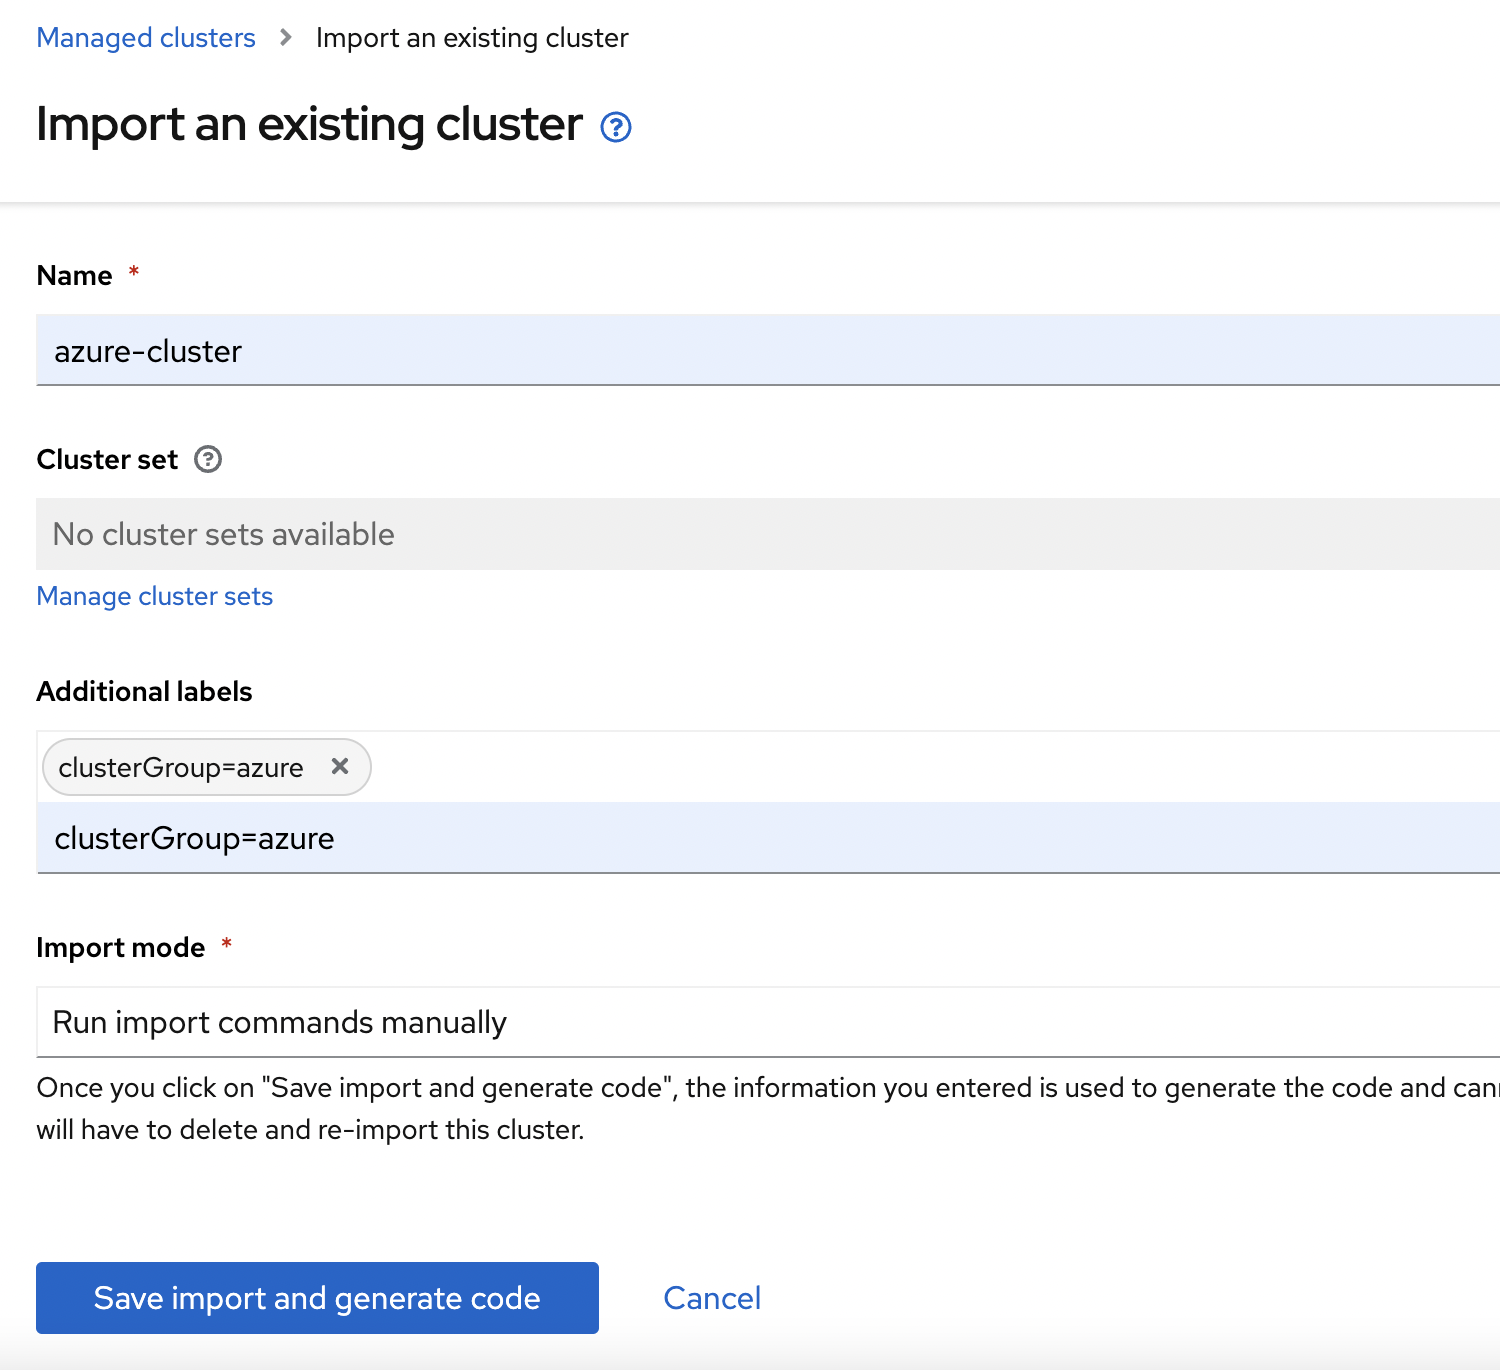
Now in RedHat ACM UI, under clusters view click on "Import Cluster" and enter the following values in the corresponding fields:
-
Name: azure-cluster
-
Additional Labels: clusterGroup=azure
-
Click on "Save import and generate code"
-
-
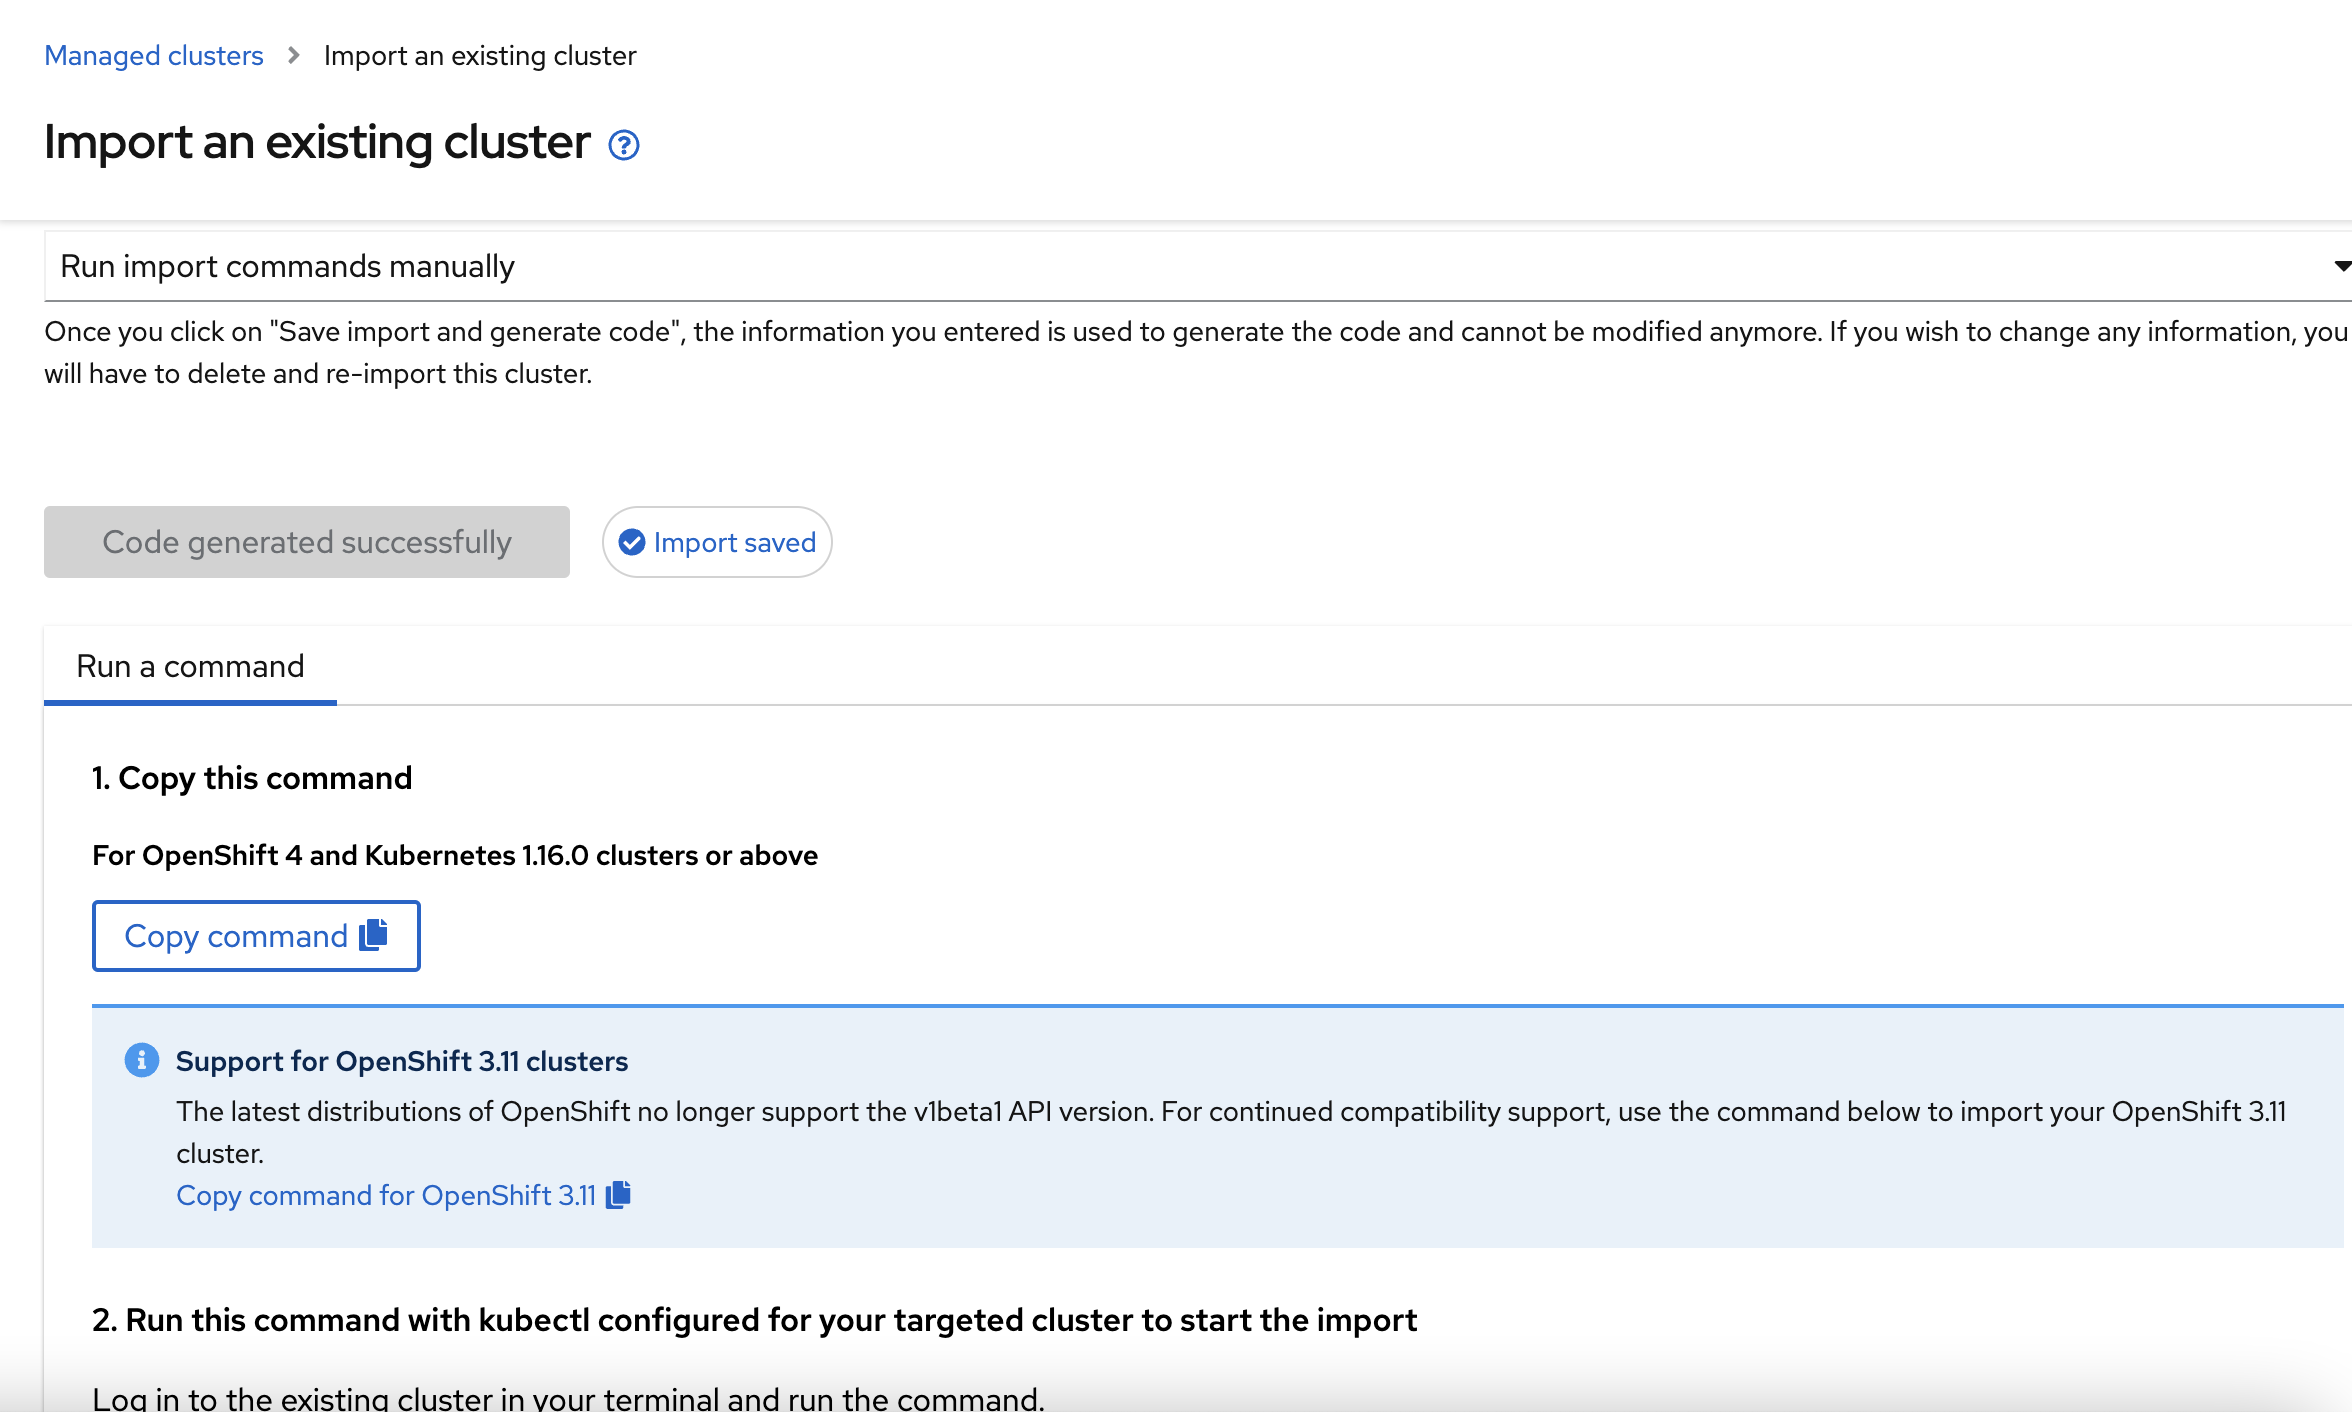
RedHat ACM will generate the command, click on "Copy command" to copy the command.
-
Login into Azure Openshift cluster using oc login or exporting the KUBECONFIG in a separate terminal.
-
Run the copied command in the latest terminal where we logged in Azure Openshift cluster. Once executed successfully, it will show the below output.
-
Check RedHat ACM UI and Azure Cluster will be marked as ready under clusters.
-
We have imported Azure Openshift cluster successfully and it will be managed by RedHat ACM now.


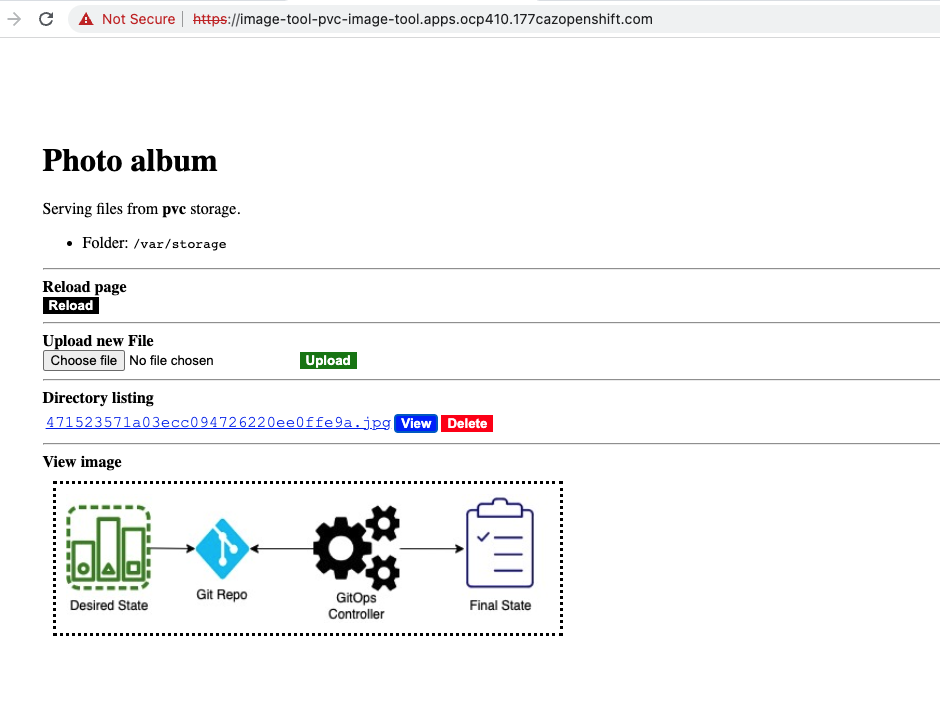
MultiCloud GitOps Flow: This flow displays how different components are getting deployed and where are these getting deployed. ArgoCD is a critical component of the architecture. A policy on RedHat ACM ensures all the managed clusters have their own ArgoCD deployed through an Openshift GitOps operator. ArgoCD on a managed cluster uses GitHub repo to deploy the applications.

2.3. Walkthrough guide
In a MultiCloud GitOps with ODF pattern, once the installation is done using above instruction we can follow the below steps to walkthrough it.
-
Our Hub Cluster is running in Openshift cluster in AWS. Login into Openshift using terminal cli and run the below command to get ArgoCD url and password.
oc -n openshift-gitops get route | grep https && oc -n openshift-gitops extract secrets/openshift-gitops-cluster --to=- -
Using the url and admin password from previous command, we will be able to login into ArgoCD. ArgoCD UI will look like this.
-
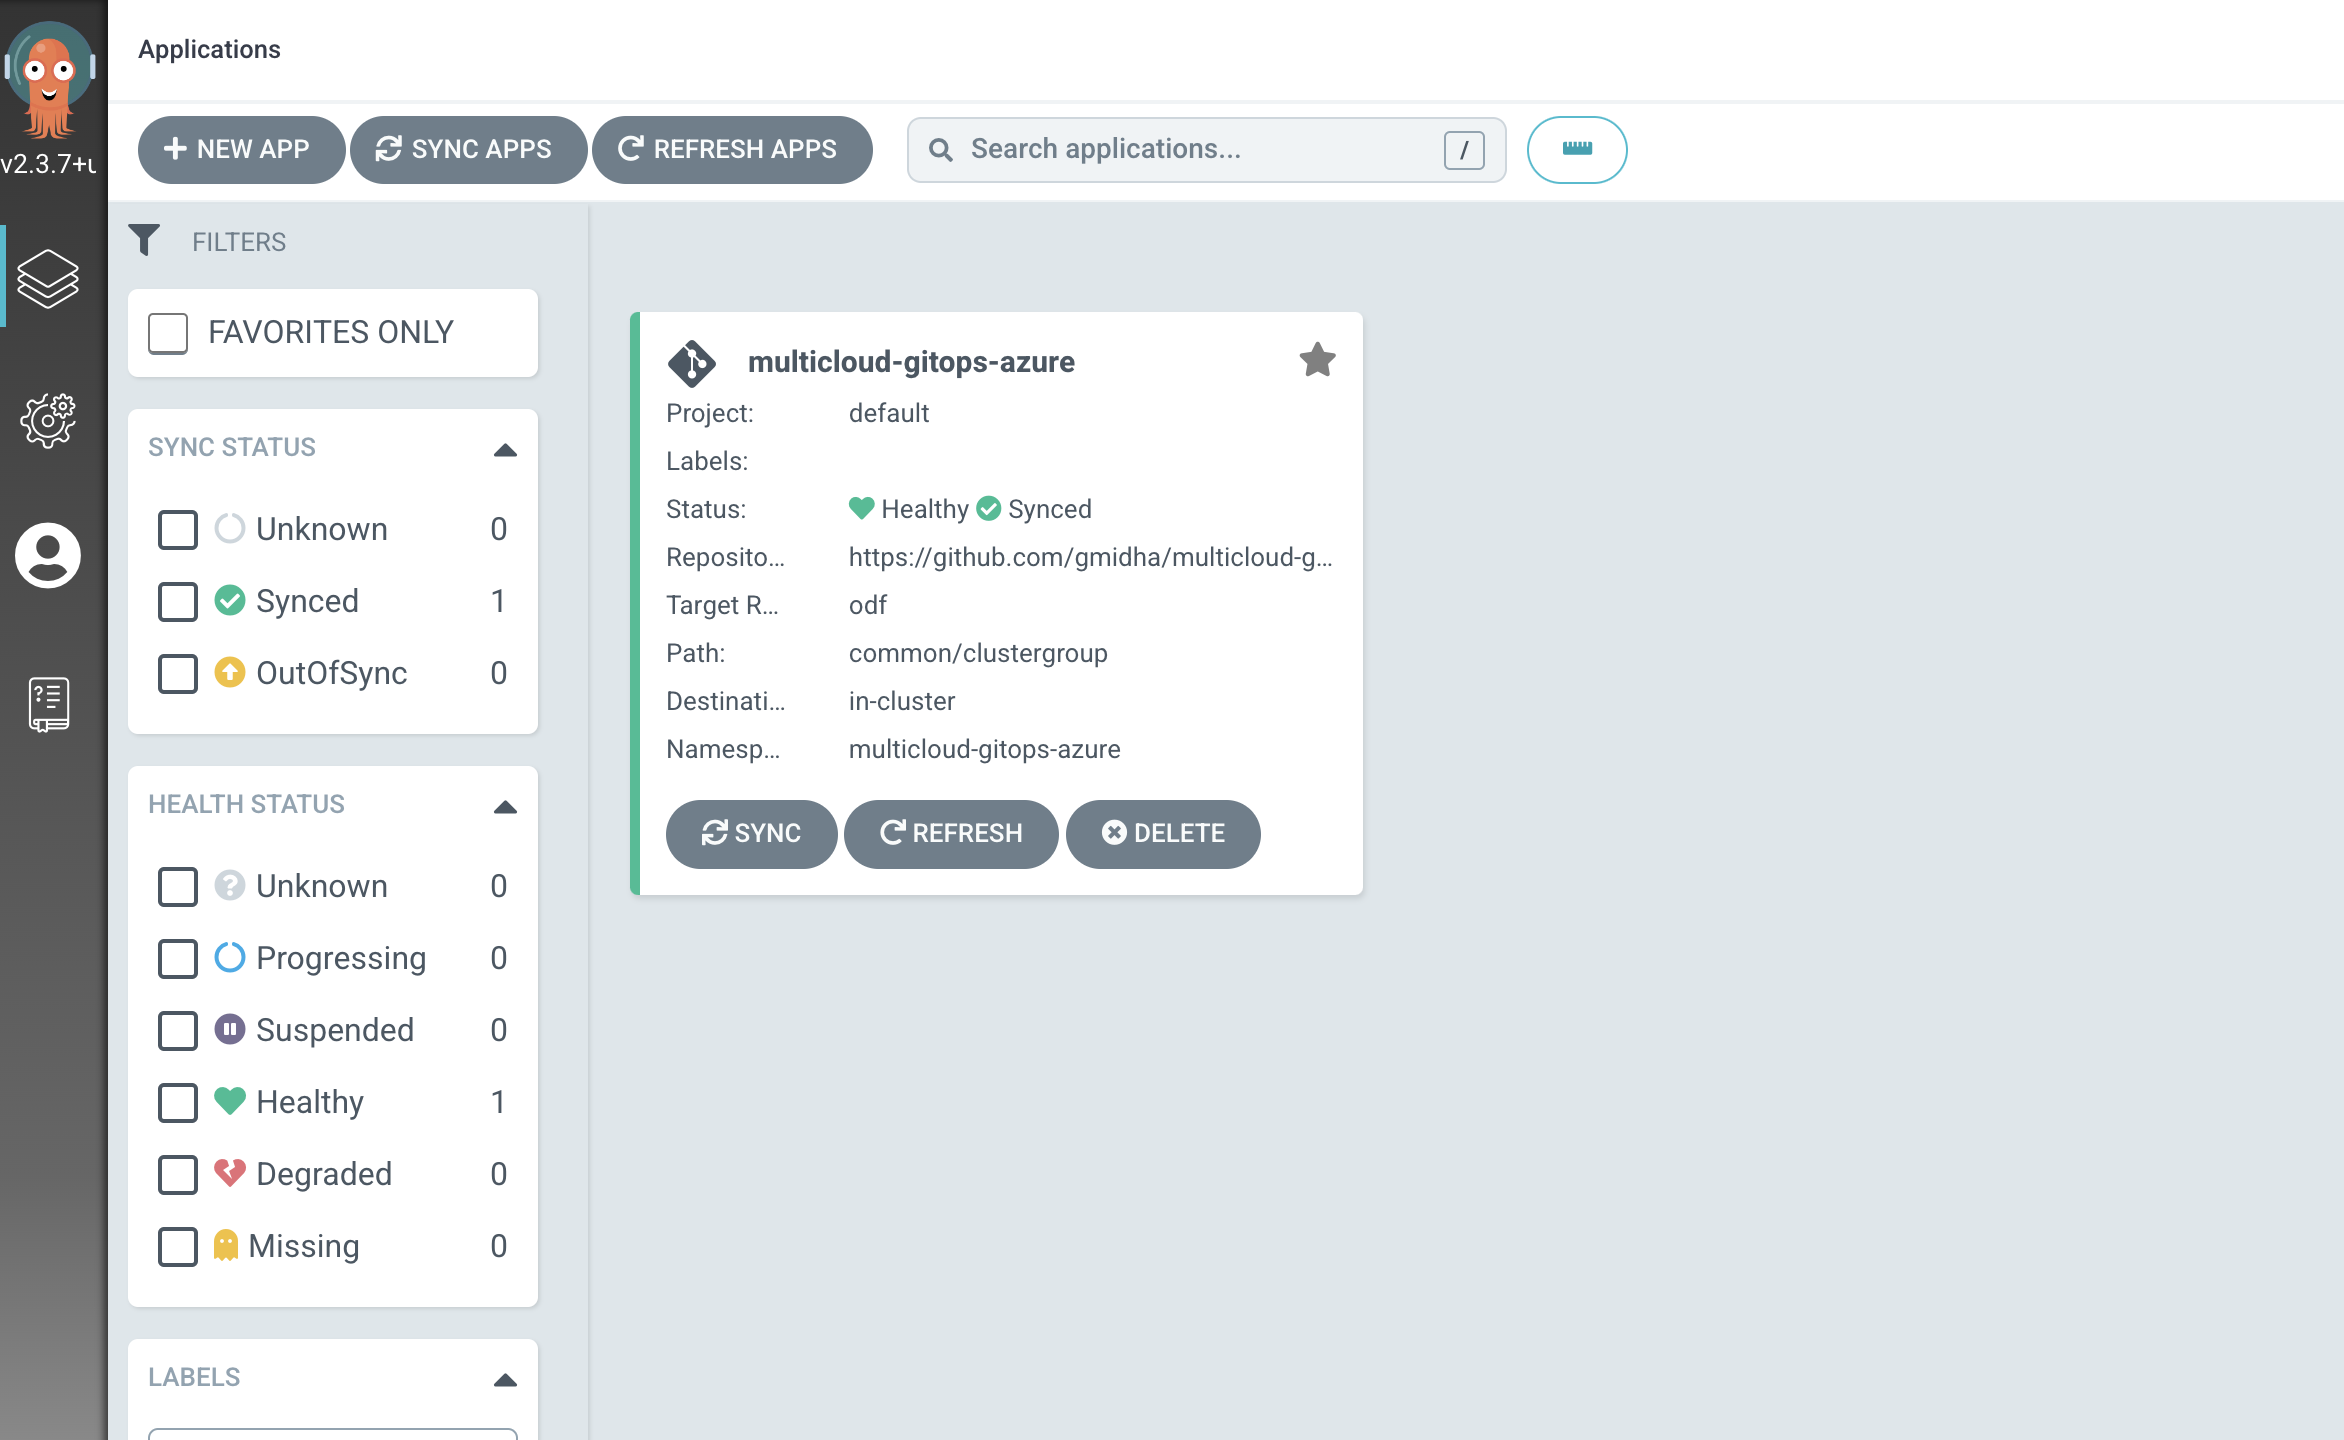
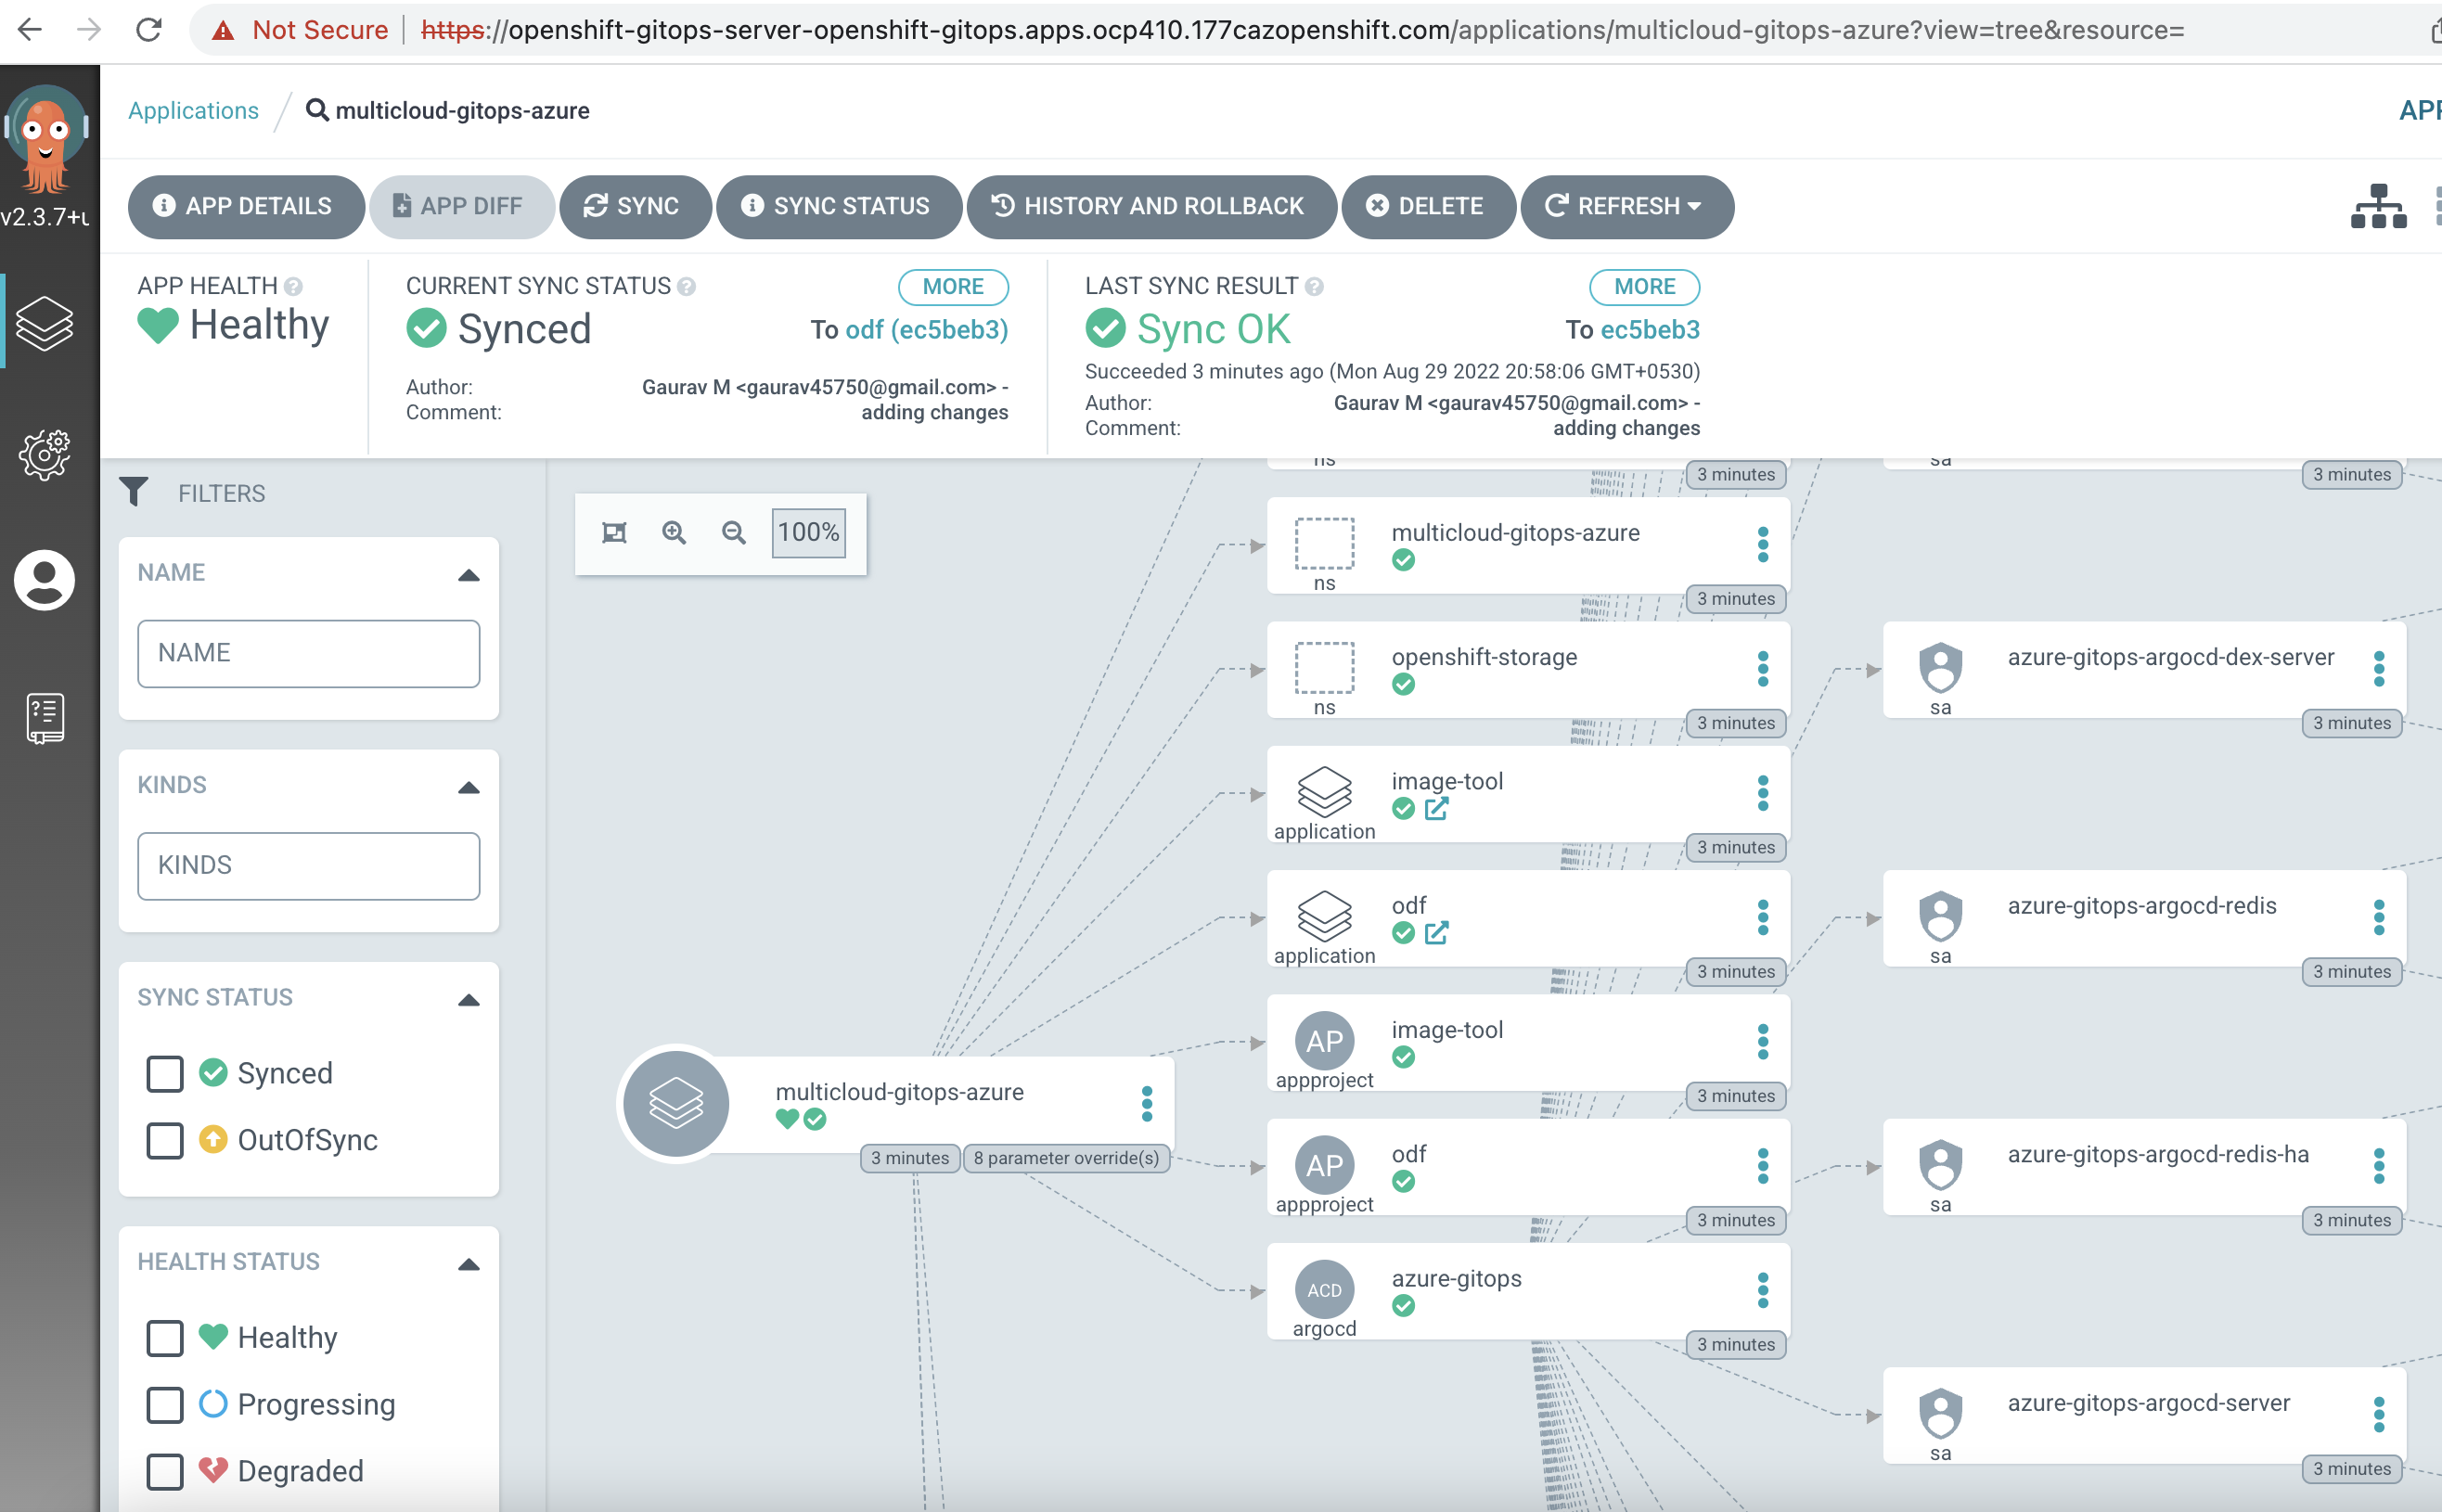
We can click on "multicloud-gitops-hub" application to see all the components that are deployed.
1.To validate the components for RedHat ACM were deployed successfully in Hub Cluster, we can use this command and check pods.
oc get pods -n open-cluster-management -
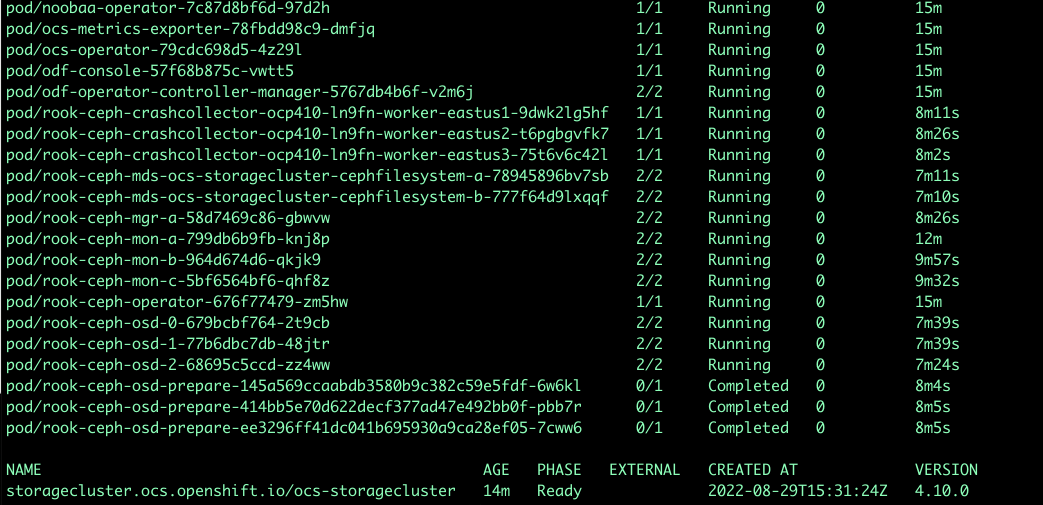
To get the status of StorageCluster and pods for RedHat ODF, we can use this command.
oc get pods,StorageCluster -n openshift-storage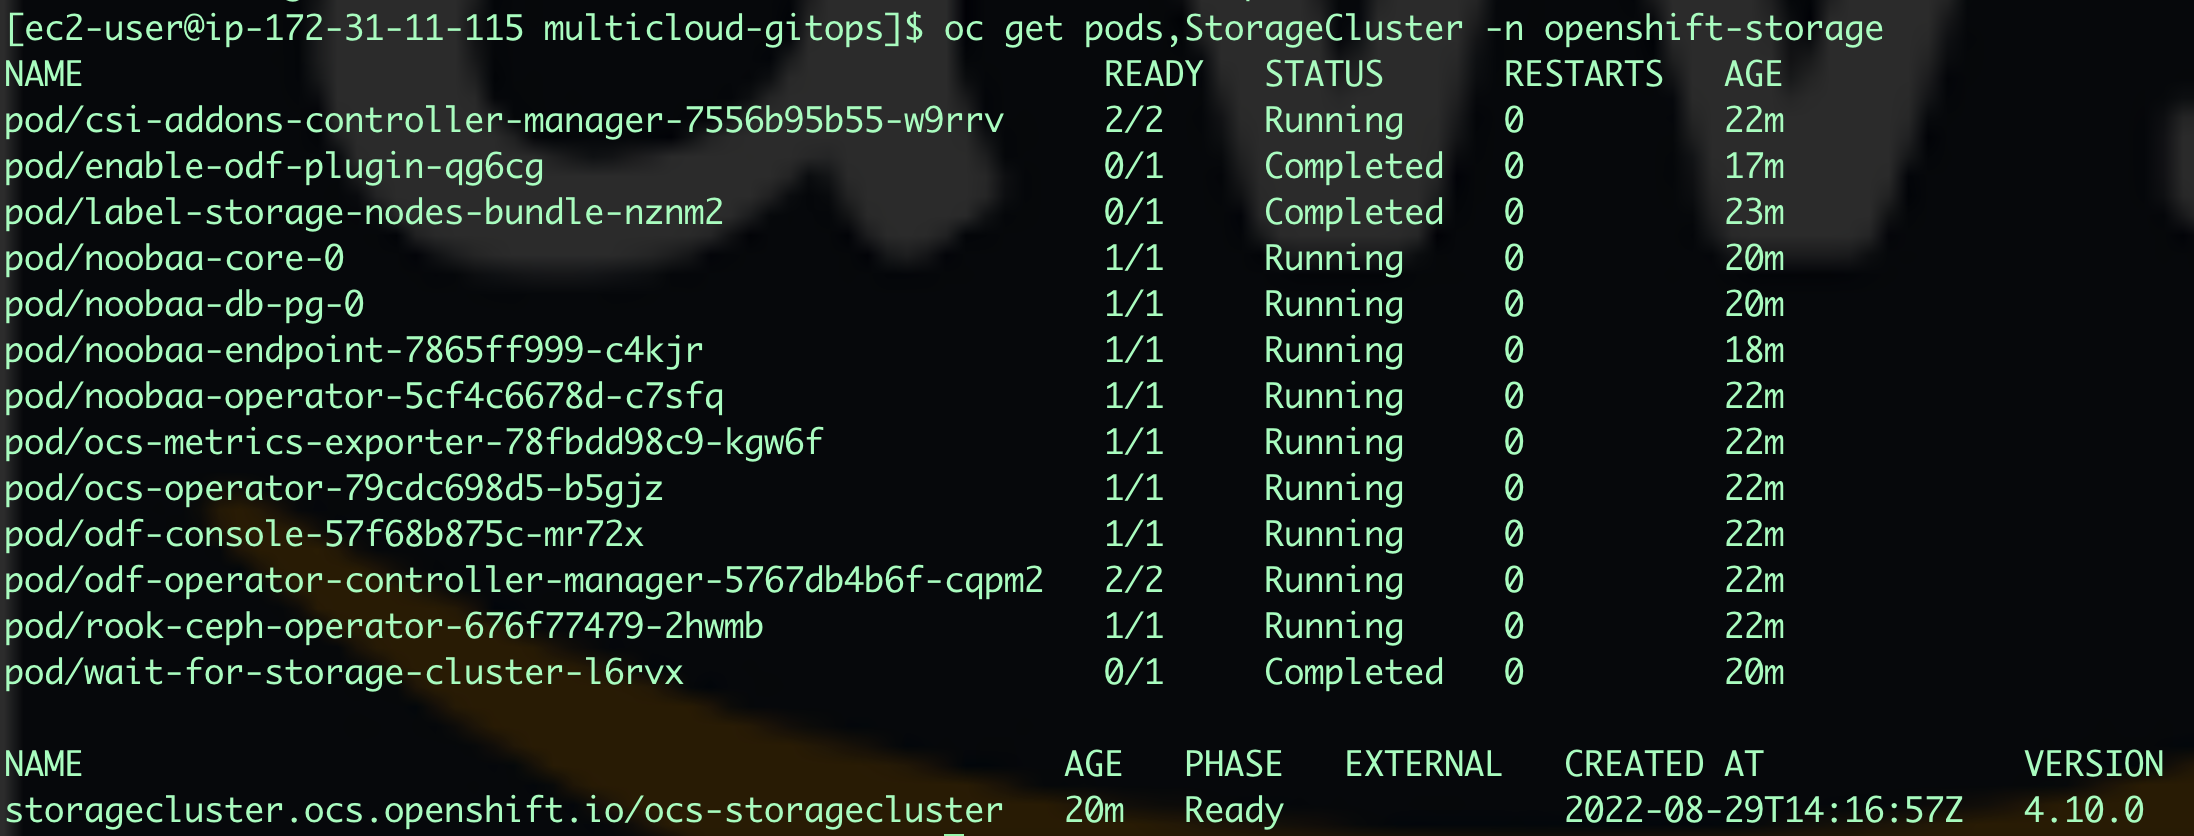
-
To see the status of RedHat Quay, we can use this command.
oc get pods,QuayRegistry -n quay-enterprise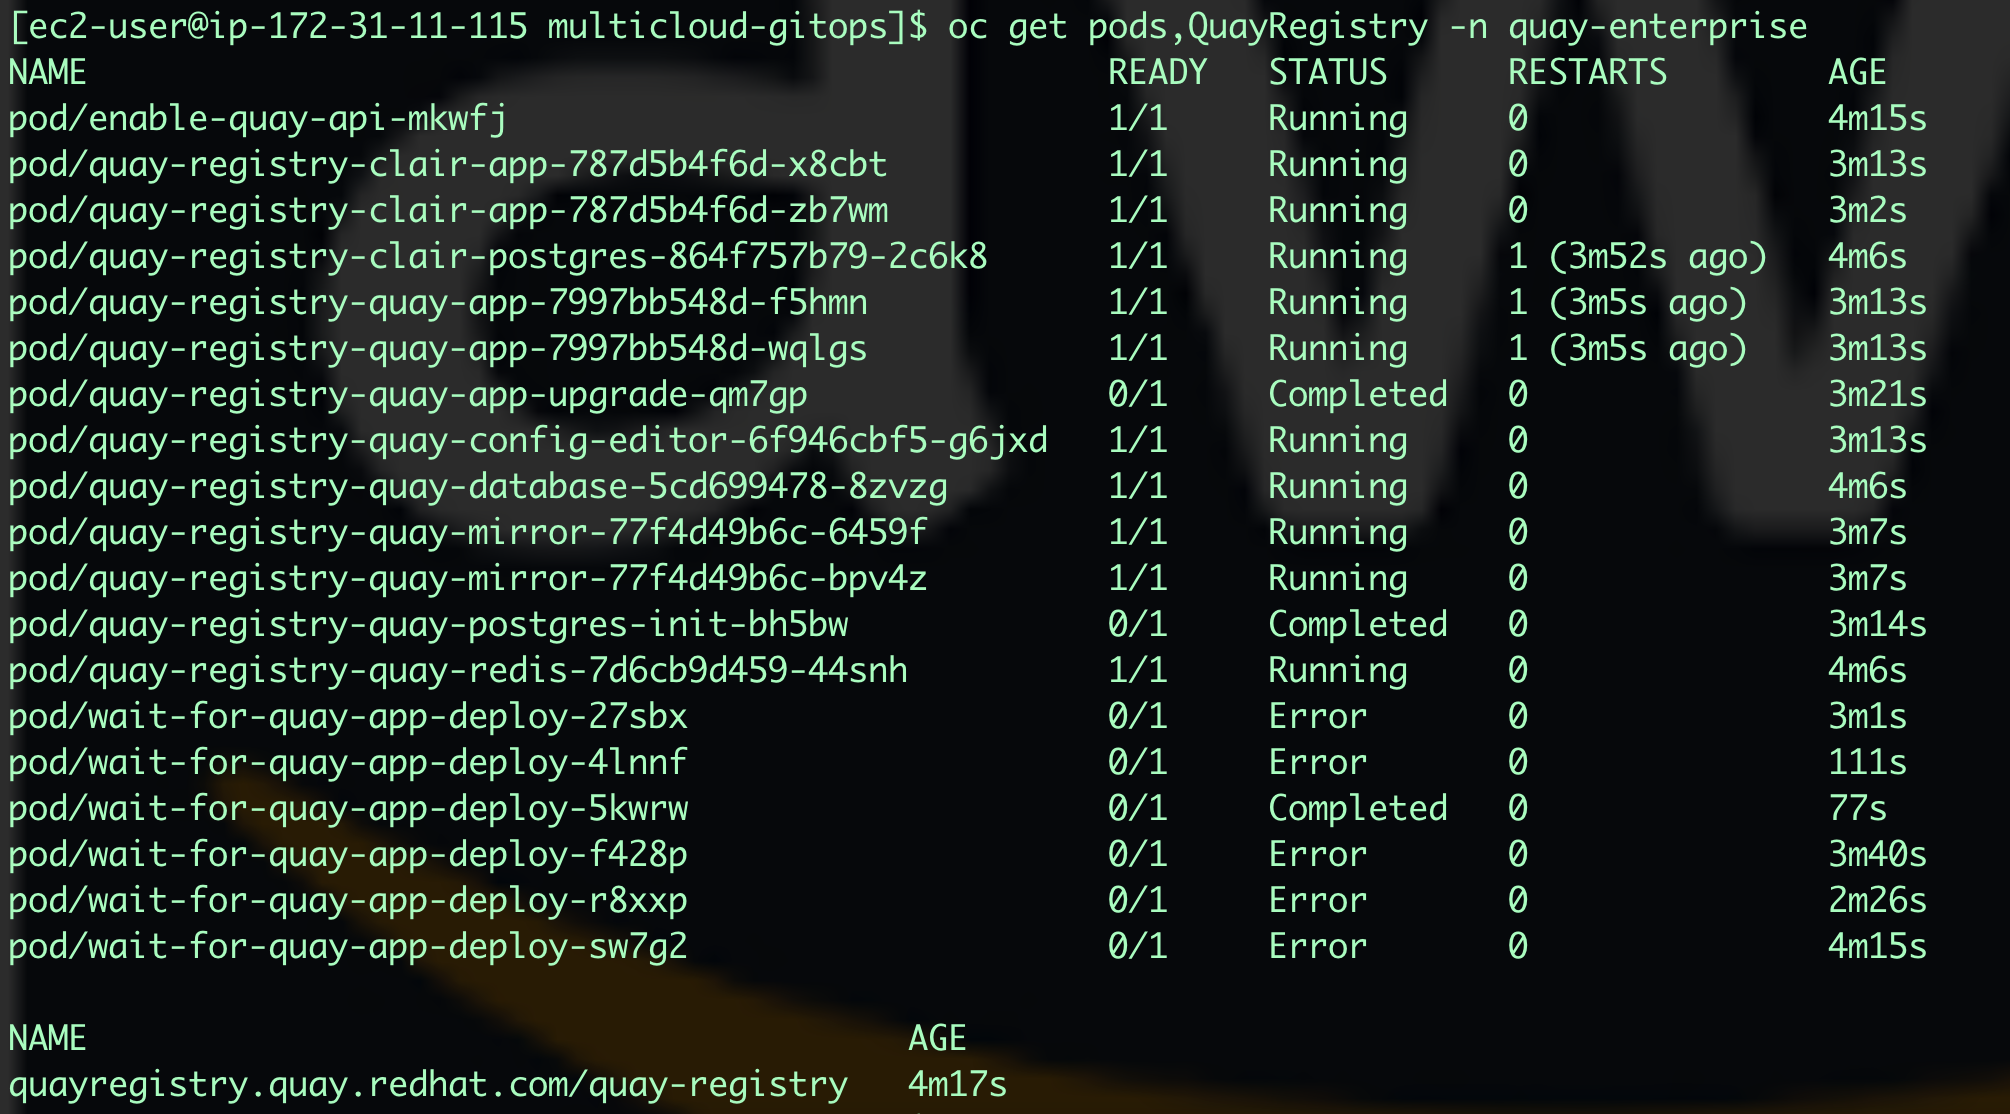
-
Note: If for some reason, all pods are in error state, run "oc delete project quay-enterprise" and sync the application with Replace checkbox selected. It will redeploy RedHat Quay.
-
To get the URL of RedHat Quay, we can use this command. We can use this url for logging into RedHat Quay.
oc get route quay-registry-quay -n quay-enterprise -
So far we have seen the components deployed in Hub Cluster. Now we will be looking at Openshift Azure Cluster managed by Hub Cluster.
-
Login into Managed cluster using oc login or exporting the KUBECONFIG.
oc login -
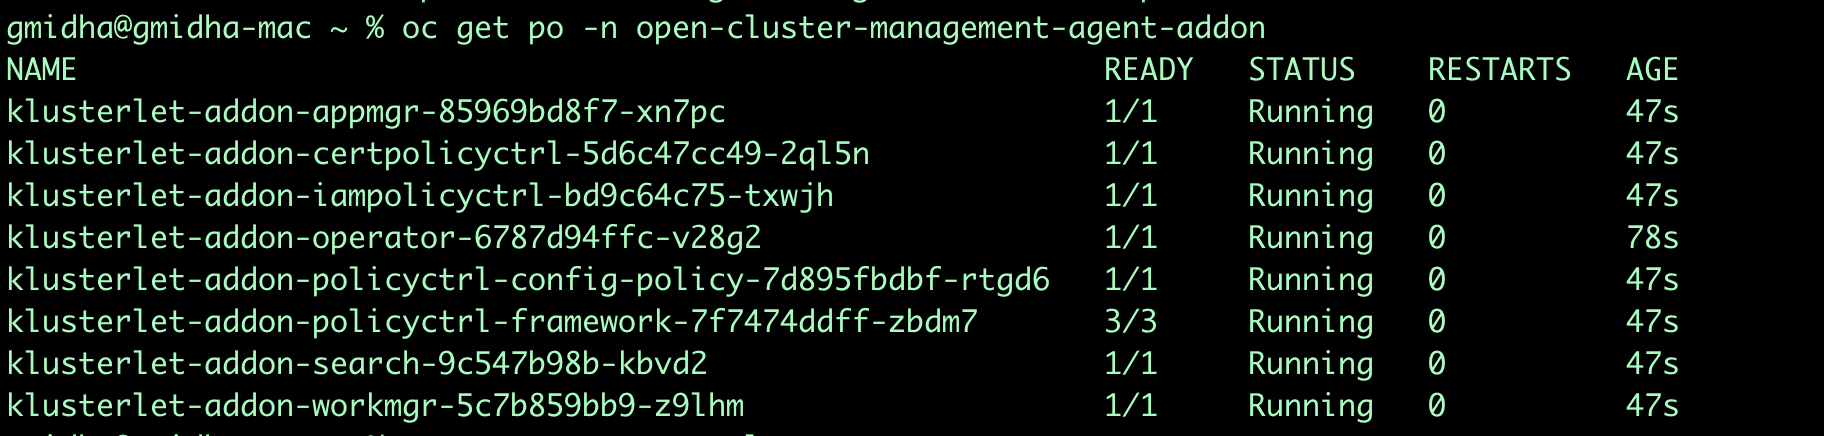
Once an Openshift Cluster becomes a managed cluster, we can see the pods in open-cluster-management-agent and open-cluster-management-addon to ensure all the required pods are up and running.
oc get pods -n open-cluster-management-agentoc get pods -n open-cluster-management-agent-addon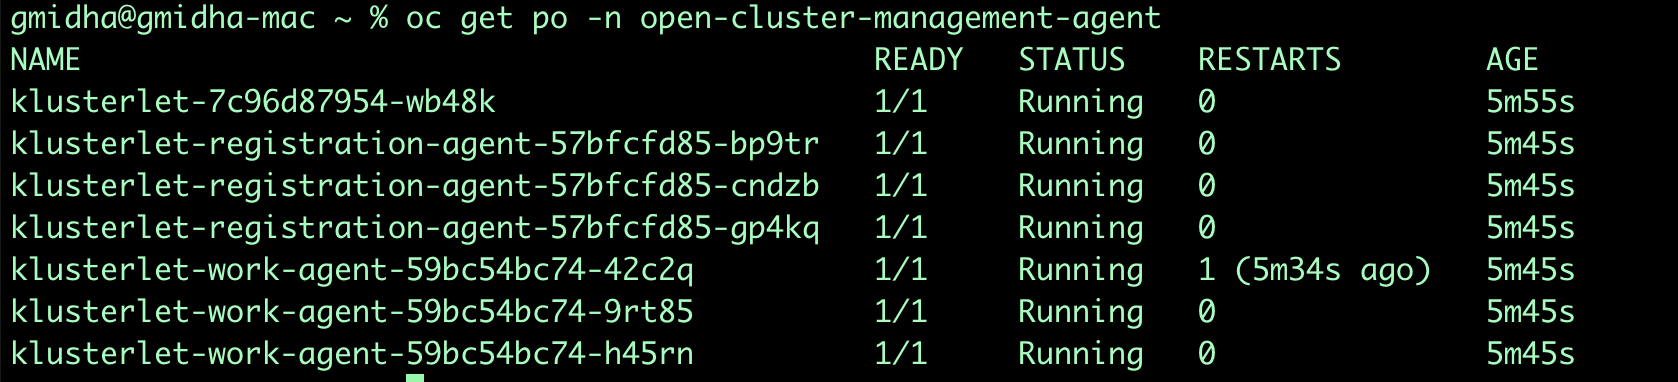
-
Run the below command to get ArgoCD url and admin’s password for login.
oc -n openshift-gitops get route | grep https && oc -n openshift-gitops extract secrets/openshift-gitops-cluster --to=- -
Once logged in into ArgoCD, we will see the application deploy. We can click on the application to see all the compoenents it deployed.
-
Using cli, now we will check the status of ODF pods and Storage Cluster in the Managed cluster. StorageCluster takes 10+ min for deployment.
oc get pods,StorageCluster -n openshift-storage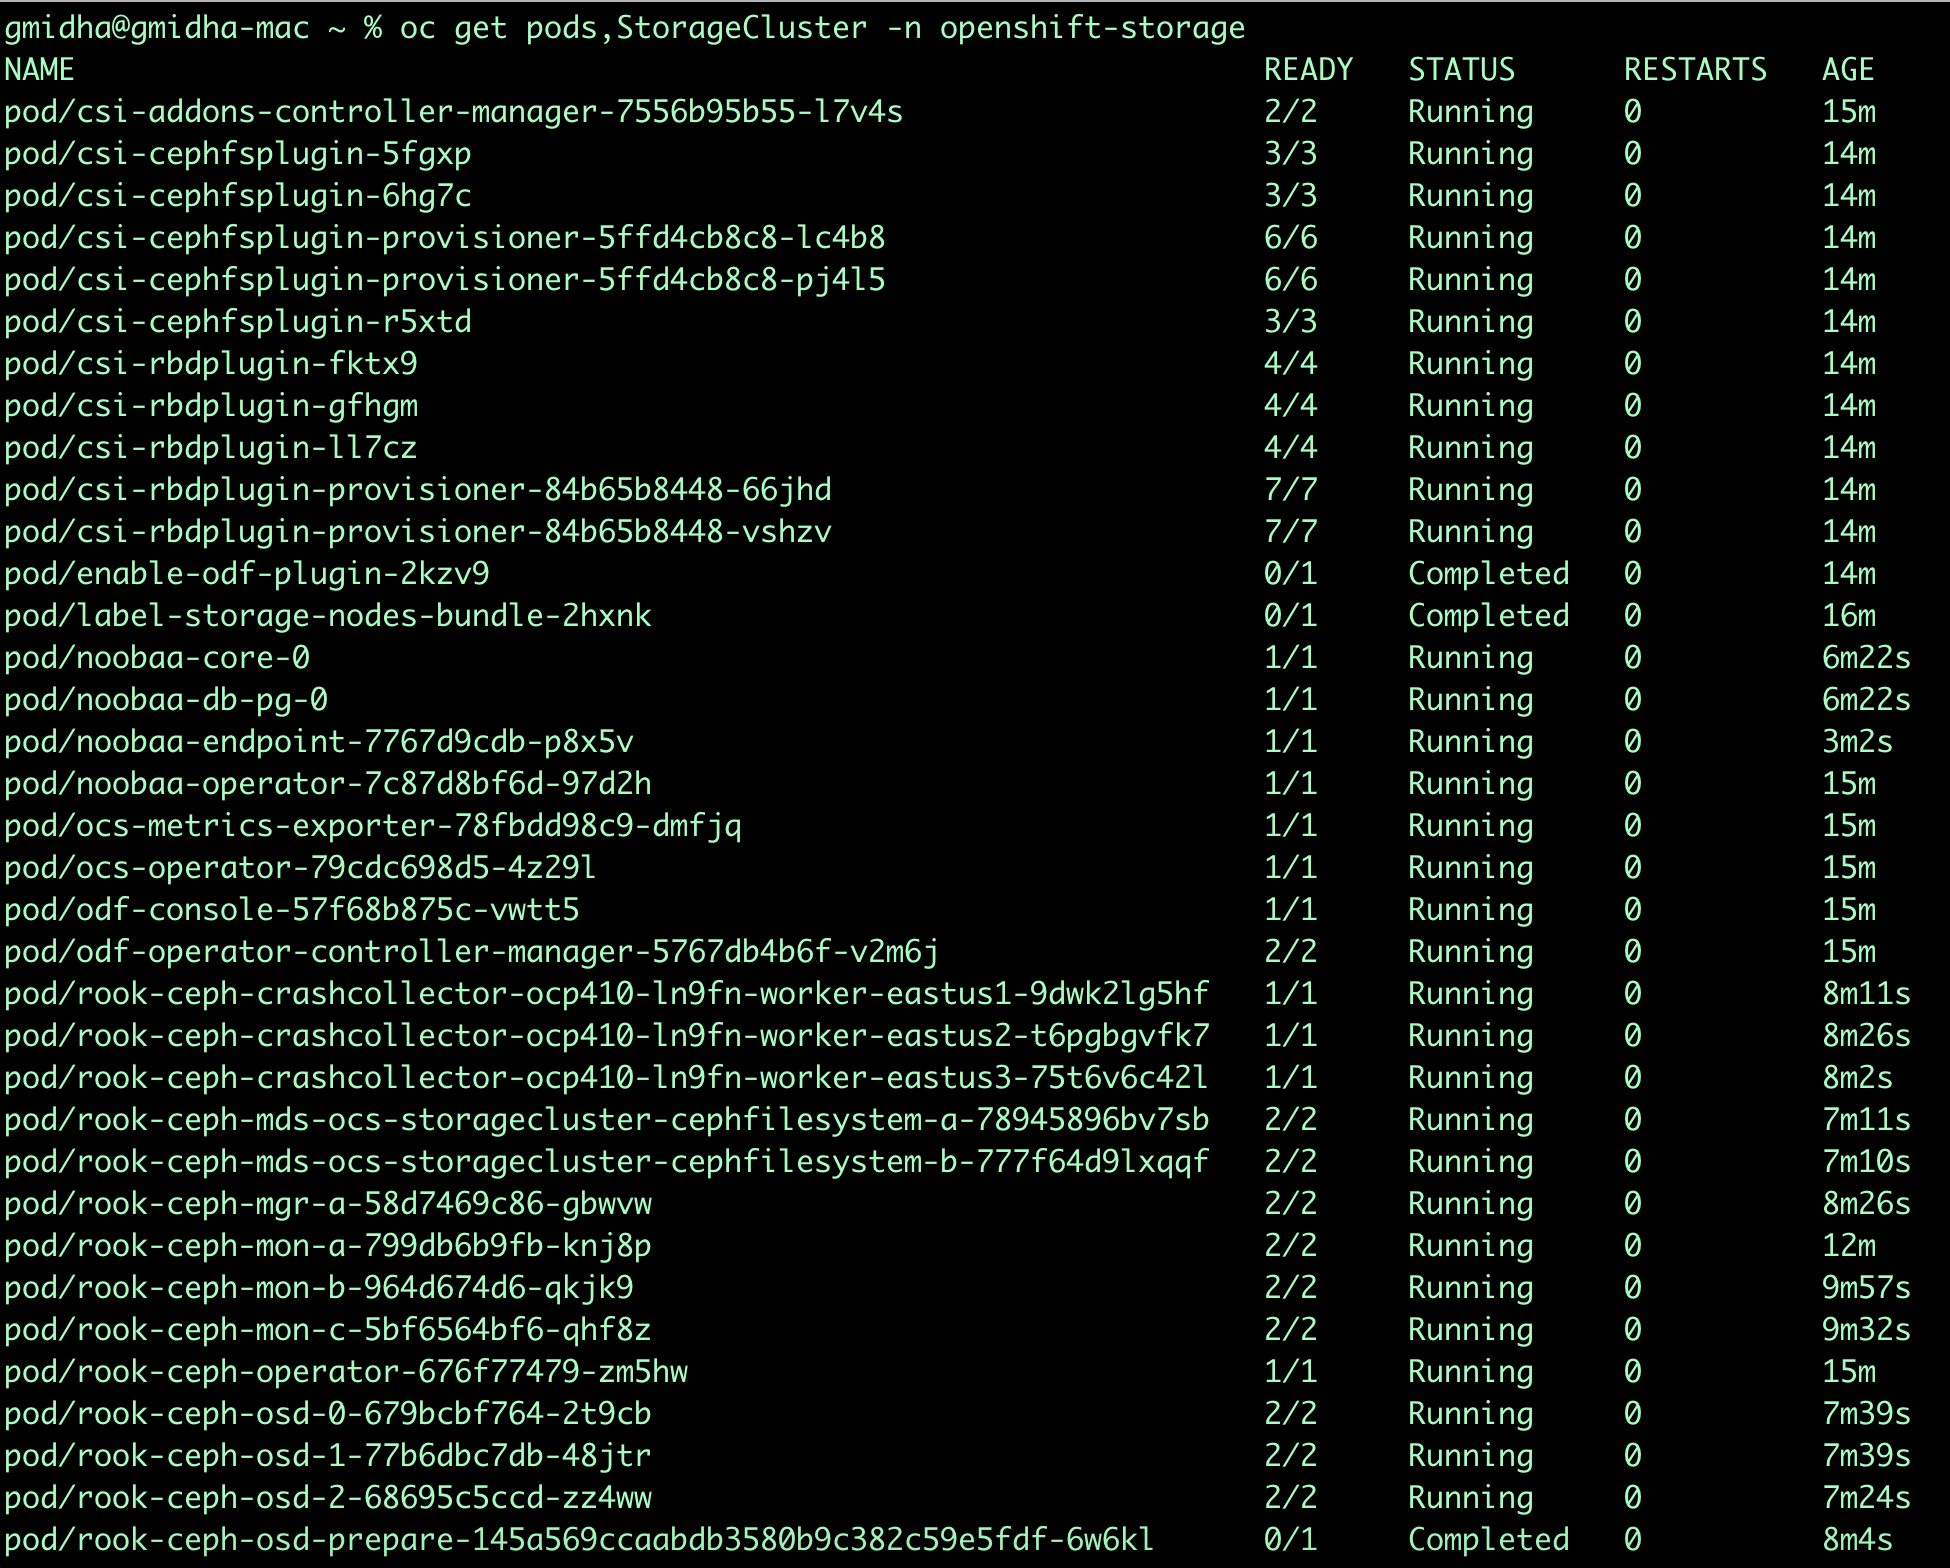
-
We can also check the available storageclasses once ODF installation is complete by using this cli.
oc get storageclasses
-
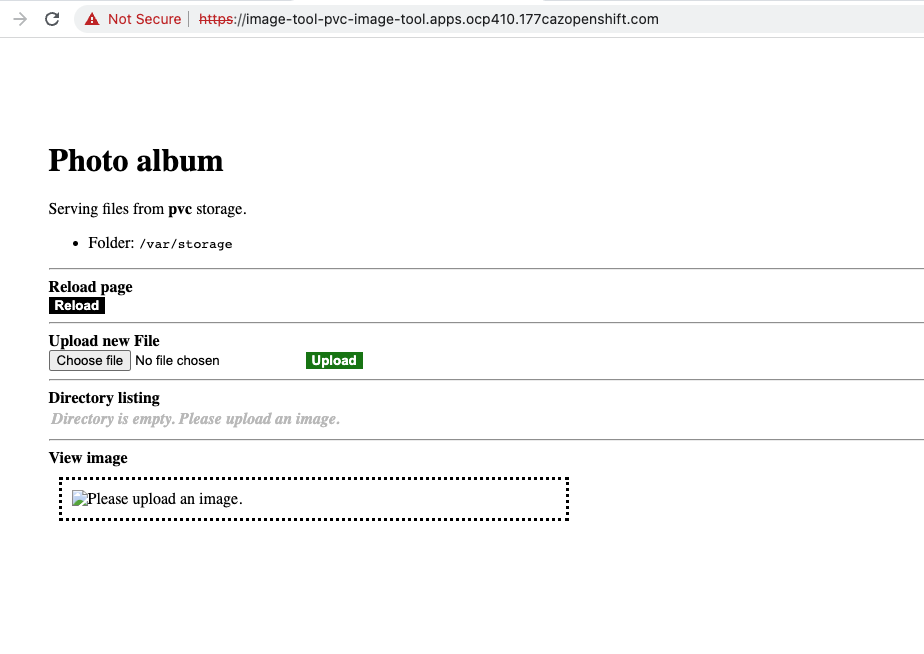
To test the deployment of StorageCluster, we are using an application Image Tool. This application is deployed in image-tool namespace. To check the status of application and get its route and pvc, we will use the following cli commands.
oc get pods -n image-tooloc get route -n image-tooloc get pvc -n image-tool


-
Using the above two urls in a web browser, we can use the application which is using above shown PVC to store file objects.
-
We can upload the files through UI and it will get stored in a persistent volume store.
-
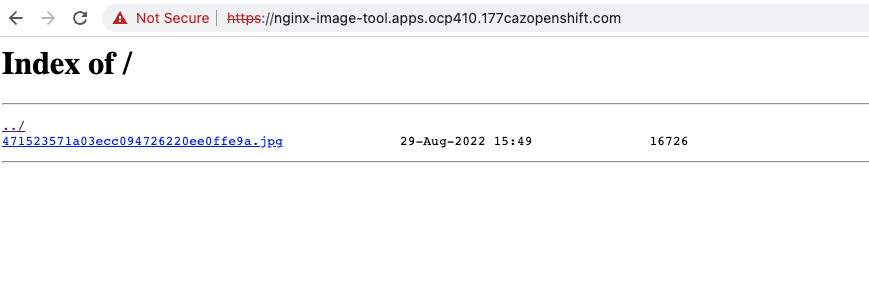
We have another application nginx as part of Image tool, using the url from routes we can access this application. This application uses the same storage and hence the file uploaded from Image tool will be accessible through Nginx UI.
-
We can click on the file shown above and access it.


