Using Red Hat Service Interconnect to extend the reach of Ansible Automation Platform
See the Solution in Action
1. Before running the solution
In order to reproduce the following solution, you will need the following resources:
-
Access to a running Red Hat OpenShift cluster with Red Hat Ansible Automation Platform operator available through the Operator Hub
-
A subscription or trial license for Red Hat Ansible Automation Platform (running on Red Hat OpenShift cluster)
-
Red Hat Service Interconnect (version 2.0) Controller deployment YAMLs for Red Hat OpenShift
-
Red Hat Service Interconnect (version 2.0) RPM to be installed at the Red Hat Enterprise Linux machine (for Third-party Network A)
-
A few virtual machines to be used as third-party servers, with SSH server running
-
A machine or a virtual machine with Red Hat Enterprise Linux to simulate third-party network A, with access to the respective servers
-
A Linux machine or virtual machine with Podman version 4+ to simulate third-party network B, with access to the respective servers (optional)
-
Install the Skupper CLI version 2.0
-
The following commands are expected:
kubectl,jq,awk,wgetandpodman
2. Walkthrough
2.1. Installing the Red Hat Service Interconnect command line tool
You need to install the Red Hat Service Interconnect command line tool in order to generate AccessTokens to connect your third-party network sites with Red Hat Service Interconnect running in the cloud.
dnf config-manager --set-enabled service-interconnect-2-for-rhel-9-x86_64-rpms
dnf install skupper-cli-2.0.0
2.2. Installing the Red Hat Service Interconnect Router on Third-Party Network A
The solution architecture diagram tells you that the Third-Party Network A will run Red Hat Service Interconnect on a Red Hat Enterprise Linux server as a regular process, which depends on the Red Hat Service Interconnect Router RPM package being installed first.
You can optionally run Red Hat Service Interconnect there using Podman, if it is more convenient to you. If that is the case, you can skip the following task.
dnf config-manager --set-enabled service-interconnect-2-for-rhel-9-x86_64-rpms
dnf install skupper-router-3.2.0
2.3. Installing Red Hat Service Interconnect on Red Hat OpenShift
We need to install Red Hat Service Interconnect on the Red Hat OpenShift cluster as we will need to create two separate Sites in two distinct namespaces. The reason for this is to ensure that each Third-party Site is connected to an isolated Virtual Application Network (VAN).
Along with that we will also create Network Policies to ensure that each namespace is only accessible by AAP, so that the third-party servers exposed into the Red Hat OpenShift cluster can only be reached internally by AAP.
2.3.1. Installing the Red Hat Service Interconnect controller
The RHSI controller is deployed to its own namespace and it has the ability to watch for RHSI resources across all namespaces in the Red Hat OpenShift cluster. You can install the RHSI controller using the following approaches:
-
The Red Hat Service Interconnect Operator (available through the Red Hat operators catalog on OpenShift clusters)
-
NOTE: you must use channel stable-2
-
-
Using YAMLs available through the Red Hat Software Downloads page
-
Product: Red Hat Service Interconnect
-
Version: 2.0.0
-
Type: Distributions
-
File: Skupper deployments (yamls)
-
Let’s install the RHSI controller using the downloaded YAMLs:
-
Open a terminal
-
Download the RHSI controller YAMLs from Red Hat Software Downloads page (detailed above)
-
Set the KUBECONFIG environment variable
-
You must be logged in as a cluster administrator
-
-
Create the
skuppernamespace, using:kubectl create namespace skupper -
The RHSI V2 controller can be installed using:
kubectl -n skupper apply -f skupper-cluster-scope-2.0.0-rh.yaml -
Now wait for the skupper-controller pod to be running on the skupper namespace:
kubectl -n skupper wait --for=condition=Ready pod -l application=skupper-controller
2.3.2. Create namespaces for each third-party network
Once the RHSI controller is running, we need to apply the RHSI Custom Resources (CRs) for the RHSI controller to create the:
-
Sites
-
Listeners
-
AccessGrants
Just as a reminder, this walkthrough will only cover a single namespace on Red Hat OpenShift and a single third-party network. In case you want to add two or more third-party networks, the instructions are basically the same.
The first thing we need to do is create the namespace for third-party network A.
The namespace will be named: net-a.
This namespace will be used to compose the expected fully qualified hostnames to be used in the AAP inventory, example given: server-a1.net-a.
Let’s have a look at the custom resources we need to define this RHSI site.
-
Site-
A Site represents a separate RHSI instance
-
You can only have a single RHSI site per namespace
-
It is the main resource to be created
-
-
AccessGrant-
Allows AccessTokens to be redeemed by other sites
-
Can be configured to permit a certain amount of token redemptions
-
Expire after pre-defined amount of time
-
AccessTokens can be generated once the AccessGrant is ready
-
-
Listener-
Represents an ingress to target workloads exposed in your Virtual Application Network (VAN)
-
On OpenShift / Kubernetes they are realized as a Service
-
Listeners must have a corresponding Connector available in some other Site linked to the VAN
-
The site definiton sets the linkAccess value to default. This will ensure that the default ingress method for the target cluster will be used.
On Red Hat OpenShift clusters, a Route should be created, otherwise a LoadBalancer service will be created.
This ingress method is used to accept incoming links, coming from other Sites.
The AccessGrant allows a single AccessToken to be redeemed and it must be redeemed within 30 minutes from AccessGrant creation, otherwise it won’t be valid anymore.
Each site has a Listener for each target server expected by AAP.
The spec.host field determines the service name that will be created on the respective namespace,
therefore the fully qualified service name will be composed by the spec.host field plus the namespace name, matching the hostnames that will be added to the inventories on AAP.
The spec.routingKey is used to determine the matching Connector.
So the RHSI sites created inside the third-party networks, must define the respective spec.routingKey.
Along with the RHSI resources, Network policies will be defined, to add an extra security layer, preventing undesired internal access to your third-party network namespaces.
These NetworkPolicies allow ingress to the skupper-router pod only coming from pods running on the aap namespace, the self namespace net-a or from external sites (through Red Hat Service Interconnect links).
To create the namespace, the RHSI site and the network policies, run the following commands in your terminal that has access to the Red Hat OpenShift cluster. The commands below will first create the resources in a local directory then apply them to the Red Hat OpenShift cluster.
# create a directory to hold all resources
mkdir -p cloud/net-a/

# create the resources needed
cat << EOF > cloud/net-a/00-ns.yaml
apiVersion: v1
kind: Namespace
metadata:
  name: net-a
EOF

cat << EOF > cloud/net-a/10-site.yaml
apiVersion: skupper.io/v2alpha1
kind: Site
metadata:
  name: net-a
  namespace: net-a
spec:
  linkAccess: default
EOF

cat << EOF > cloud/net-a/20-accessgrant.yaml
apiVersion: skupper.io/v2alpha1
kind: AccessGrant
metadata:
  name: net-a-grant
  namespace: net-a
spec:
  redemptionsAllowed: 1
  expirationWindow: 30m
EOF

cat << EOF > cloud/net-a/30-listeners.yaml
---
apiVersion: skupper.io/v2alpha1
kind: Listener
metadata:
  name: server-a1
  namespace: net-a
spec:
  host: server-a1
  port: 22
  routingKey: server-a1
  type: tcp
---
apiVersion: skupper.io/v2alpha1
kind: Listener
metadata:
  name: server-a2
  namespace: net-a
spec:
  host: server-a2
  port: 22
  routingKey: server-a2
  type: tcp
---
apiVersion: skupper.io/v2alpha1
kind: Listener
metadata:
  name: server-a3
  namespace: net-a
spec:
  host: server-a3
  port: 22
  routingKey: server-a3
  type: tcp
EOF

cat << EOF > cloud/net-a/40-networkpolicy.yaml
---
apiVersion: networking.k8s.io/v1
kind: NetworkPolicy
metadata:
  name: network-policy-aap
  namespace: net-a
spec:
  podSelector:
    matchLabels:
      app.kubernetes.io/name: skupper-router
  policyTypes:
  - Ingress
  - Egress
  ingress:
  - from:
    - namespaceSelector:
        matchExpressions:
        - key: 'kubernetes.io/metadata.name'
          operator: In
          values: ["aap", "net-a"]
  egress:
  - {}
---
apiVersion: networking.k8s.io/v1
kind: NetworkPolicy
metadata:
  name: allow-from-router
  namespace: net-a
spec:
  ingress:
  - from:
    - namespaceSelector:
        matchLabels:
          policy-group.network.openshift.io/ingress: ""
  podSelector: {}
  policyTypes:
  - Ingress
EOF

kubectl apply -f ./cloud/net-a/
You can verify that your site has been created running:
kubectl -n net-a get pod,siteAnd you should see an output similar to this one:
NAME                                  READY   STATUS    RESTARTS   AGE
pod/skupper-router-78b5b8ddb5-h76sm   2/2     Running   0          53m

NAME                    STATUS   SITES IN NETWORK
site.skupper.io/net-a   OK
2.3.3. Preparing site bundles for the third-party network
A site bundle is a compressed file that contains the whole RHSI site definition to run outside of Kubernetes or OpenShift.
They can be installed to run as a container, using Podman or Docker and also as a regular process on a Red Hat Enterprise Linux server, which will require a local installation of the skupper-router RPM package (explained earlier).
The site bundle is an easy approach to install a prepared site definition on a remote location, but you could also create a system site using the Red Hat Service Interconnect V2 CLI or a bootstrap container.
Here are the Custom Resources (CRs) needed to define the site bundles.
-
Site -
Connectors -
AccessToken(will be generated fromAccessGrantscreated earlier)
In order to prepare a site bundle to be installed at the Third Party Networks, we will create the Custom Resources (CRs) needed along with an AccessTokens that will be extracted from the net-a namespace running on the Red Hat OpenShift cluster.
To do it, execute the following commands on a terminal with access to net-a namespace, running on your Red Hat OpenShift cluster:
mkdir -p internal/net-a

cat << EOF > internal/net-a/10-site.yaml
apiVersion: skupper.io/v2alpha1
kind: Site
metadata:
  name: net-a
EOF

cat << EOF > internal/net-a/20-connectors.yaml
---
apiVersion: skupper.io/v2alpha1
kind: Connector
metadata:
  name: server-a1
spec:
  host: 192.168.8.101
  port: 22
  routingKey: server-a1
---
apiVersion: skupper.io/v2alpha1
kind: Connector
metadata:
  name: server-a2
spec:
  host: 192.168.8.102
  port: 22
  routingKey: server-a2
---
apiVersion: skupper.io/v2alpha1
kind: Connector
metadata:
  name: server-a3
spec:
  host: 192.168.8.103
  port: 22
  routingKey: server-a3
EOF

kubectl -n net-a get accessgrant net-a-grant -o template --template '
apiVersion: skupper.io/v2alpha1
kind: AccessToken
metadata:
  name: net-a-token
spec:
  code: "{{ .status.code }}"
  ca: {{ printf "%q" .status.ca }}
  url: "{{ .status.url }}"
' > internal/net-a/30-accesstoken.yaml
Now that all the CRs are in place, we must generate the site bundle, using:
skupper --platform podman system setup --path ./internal/net-a -b bundleThe bundle will be generated and its location can be found through a message that says: "Installation bundle available at". Example given:
Installation bundle available at: /home/my-user/.local/share/skupper/bundles/skupper-install-net-a.sh
2.4. Connecting the Third-party Network
The last piece to complete the Red Hat Service Interconnect setup is to install the generated site-bundle on the respective server, used to reach Third-party Network A (net-a) hosts.
To install, you should just send the site bundle file: skupper-install-net-a.sh to the target server where the RHSI site will be installed, then execute it, for example:
scp skupper-install-net-a.sh my-user@my-server-third-party-net-a:
ssh my-user@my-server-third-party-net-a ./skupper-install-net-a.sh -n net-a|
The commands above have been executed against an internal host that
represents the Third Party Network A server where the RHSI site bundle
will be installed into and this server can reach the target hosts that
will be managed by AAP. |
|
If you want your Third Party Network A site to run using a regular process and not a container, you must first install the |
Once the bundle has been installed, the three servers behind the third party network should be exposed and accessible by AAP inside the Red Hat OpenShift cluster.
Now let’s have a quick look at what must be done to install and configure Red Hat Ansible Automation Platform.
2.5. Installing Red Hat Ansible Automation Platform
We will just briefly explain what is expected from your Red Hat Ansible Automation Platform installation on the Red Hat OpenShift cluster.
The Red Hat Ansible Automation Platform installation is expected to run in the "aap" namespace.
Using the Red Hat Ansible Automation Platform Operator, an instance of the "Ansible Automation Platform" resource must be created.
If you need further information, please refer to the official installation guide.
2.6. Configuring your Ansible Automation Platform instance
In order to validate this solution pattern, we will need to configure the Ansible Automation Platform (AAP) instance first.
|
Since the goal is to demonstrate how Red Hat Service Interconnect (RHSI) helps you connect your AAP automation with managed hosts that are not reachable, the AAP configuration used in this solution pattern is minimal. |
Here is what we will configure:
-
A project to run against all hosts
-
An inventory (to represent the Third-party Network A hostnames)
-
Define the credential
-
A job template (for Third-party Network A)
2.6.1. Create a project
The Ansible project that will be used in this solution pattern is a sample project provided by the Ansible team, that simply connects to each server from your inventory and displays a "Hello World" message.
In the AAP console, create a project using the following information:
-
Source control type: Git
-
Source control URL: https://github.com/ansible/ansible-tower-samples.git
-
Source control branch/tag/commit: master
2.6.2. Create the inventory
Now that the project has been created, we will create an inventory, to represent the hostnames to be managed inside the Third-party Network A.
The inventory must have entries for the following hostnames:
-
server-a1.net-a
-
server-a2.net-a
-
server-a3.net-a
|
AAP should be able to resolve these hostnames, as they have been made available as services on the |
2.6.3. Create the credential
The inventory has been created but you must also make sure you have defined the appropriate credential on the Red Hat Ansible Automation Platform Console, so that it can connect with those hostnames through SSH.
2.6.4. Create the job template
We need to create a job template.
It will basically tie the Ansible project to be executed with the inventory that defines the target hosts and associate the credential to be used to access the Third-party Network A hosts.
Make sure your Job template is configured using the correct Project, Inventory and Credential.
At this point, all the AAP configuration needed is done.
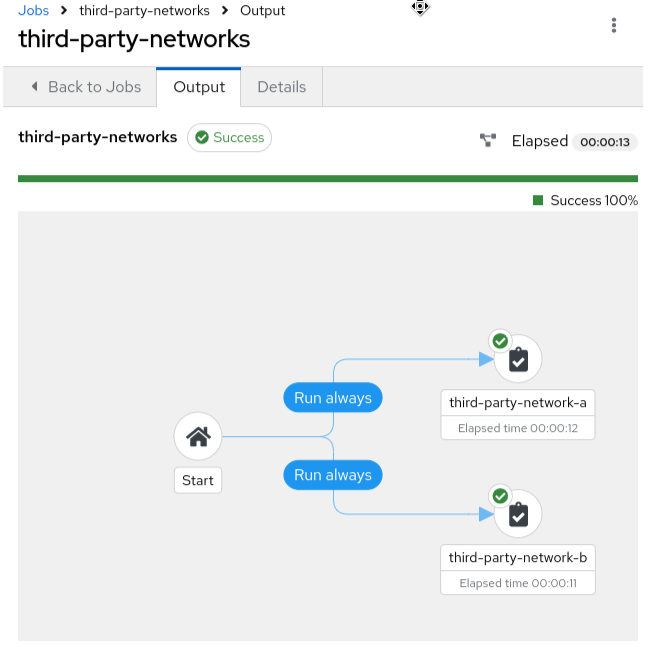
2.7. Validating the scenario
Now that the whole scenario has been deployed, the Job template that was created on AAP should be able to run and reach all servers.
Run your job template and you should be able to see a successful result, as in the illustrative example below.
3. Conclusion
Red Hat Service Interconnect dramatically expands the reach of your centralized Red Hat Ansible Automation Platform by securely managing previously inaccessible hosts.
Its user-friendly and declarative interface makes it easy to extend your automation to a wider range of devices, enabling you to manage hosts across hybrid and multi-cloud environments.